

A Grower’s Guide to the Best Nutrients for Bigger Buds
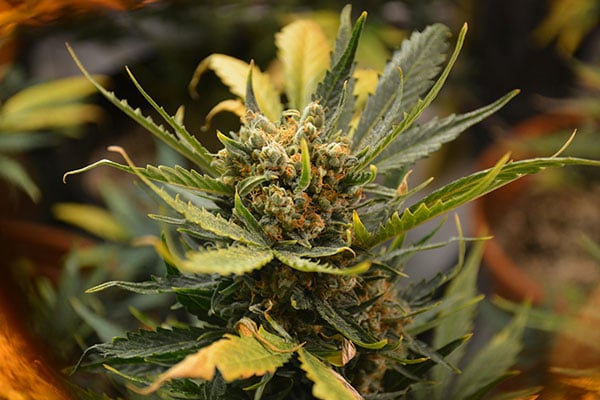
When you’re trying to grow bigger, denser buds, the secret lies in shifting your plant’s diet once flowering begins. The key is to back off the Nitrogen (N) and seriously ramp up the Phosphorus (P) and Potassium (K). Think of it as moving from a growth-focused diet to a bloom-focused one. This single change is the most fundamental step you can take to get a heavier, more impressive harvest.
The Foundation for Massive Buds: Essential Macronutrients
It helps to think of your plant’s nutrient needs like a person’s. In its “childhood”—the vegetative stage—it craves a diet rich in Nitrogen to build a strong frame of stems and leaves. But once it hits “adulthood” and starts flowering, its needs change completely. Pushing high-nitrogen food at this point is like telling an athlete to carb-load on cake; you’ll get growth, but not the kind you’re looking for.
This is where that famous N-P-K ratio you see on fertilizer bags becomes so important. These three macronutrients are the cornerstones of plant health, and getting the balance right is the bedrock of producing truly massive buds.
- Nitrogen (N) is all about green, leafy growth. It’s a core component of chlorophyll, which plants use to turn sunlight into energy.
- Phosphorus (P) is the energy and flower fuel. It’s essential for energy transfer and directly drives bud formation and maturation.
- Potassium (K) handles overall plant function and strength. It helps regulate water, strengthens cell walls, and fires up enzymes needed for sugar production, which directly impacts bud density and resin.
Shifting Gears From Veg to Flower
During the vegetative stage, you’re looking for an N-P-K ratio that favors Nitrogen, something like a 5-2-3 or 6-4-4. This encourages the plant to build a lush, green canopy that can soak up plenty of light.
But the moment you see the first signs of flowers, it’s time to pivot. If you stick with that high-Nitrogen feed, you’ll just get more leaves and stems, leading to airy, disappointing buds.
The goal is to flip the script. You’ll want to drop the Nitrogen and push the Phosphorus and Potassium way up. A good flowering ratio might look more like 2-8-4 or 5-10-7. This change sends a clear signal to the plant: stop building foliage and pour every ounce of energy into reproduction—making big, dense flowers.
The Power Duo: P and K
When it comes to packing on weight and density, Phosphorus and Potassium are the undisputed champions. Let’s dig into exactly why they are the best nutrients for bigger buds.
Phosphorus (P) is basically the plant’s energy currency. It’s a key part of ATP, the molecule that moves chemical energy around inside cells. Building complex flowers takes a massive amount of energy, and having plenty of Phosphorus ensures your plant has the fuel it needs to get the job done right. It’s directly involved in creating the literal building blocks of the buds themselves.
Potassium (K), on the other hand, is the great regulator and strengthener. It’s crucial for moving sugars and water where they need to go, which is vital for bulking up buds. It also fortifies the plant’s cell walls, making branches strong enough to hold the weight of those massive flowers you’re aiming for. Without enough Potassium, buds stay light, and the plant is weaker and more vulnerable to stress.
To help you remember what’s what, here’s a quick cheat sheet on the roles these macronutrients play during the all-important flowering stage.
Macronutrient Role in Bud Development
| Nutrient | Primary Role in Flowering | Signs of Deficiency |
|---|---|---|
| Nitrogen (N) | Supports overall plant health but is needed in lower amounts. | Yellowing of lower, older leaves (chlorosis) that moves up the plant. |
| Phosphorus (P) | Fuels energy transfer for bud formation and terpene production. | Stunted growth, dark bluish-green leaves, purple or red stems. |
| Potassium (K) | Manages water/sugar transport and strengthens plant structure. | Yellowing or browning along the edges of older leaves; weak stems. |
Getting these three balanced correctly is the first major step toward achieving the dense, heavy buds every grower wants.
While the old-school approach was often to blast plants with high levels of P and K, some modern science suggests a more measured approach can be even better. Research has challenged some traditional commercial practices, showing that a continuous phosphorus program of around 15 ppm might be the sweet spot for optimizing both bud yield and cannabinoid concentration. Learn more about these nutrient findings from North Carolina State University.
Your Week-by-Week Flowering Feed Schedule
Knowing what to feed your plants is only half the battle. The other half—the part that really separates decent harvests from truly massive ones—is knowing when to feed them. The cannabis flowering stage isn’t a single event; it’s a dynamic process where your plant’s nutritional needs change, sometimes dramatically, from one week to the next.
A good feeding schedule is all about timing your nutrient delivery to match the plant’s natural rhythm. By giving your plants what they crave at the precise moment they need it most, you can sidestep common problems like late-stage nutrient burn and make sure every drop of fertilizer goes directly into building dense, heavy buds. This isn’t about just dumping in bloom boosters; it’s a carefully timed strategy.
Weeks 1-3: The Transition to Bloom
As your plants flip into flower, they kick off a period often called “the stretch.” This is when they can literally double in height as they build the framework for future bud sites. Their nutritional needs during this phase are unique—they’re not quite done with growing, but they’re already getting ready to bloom.
- Your Game Plan: Don’t jump straight into a heavy bloom formula. I’ve found it’s best to stick with your grow-focused nutrients for the first week of flower, then gradually introduce a bloom formula over the next two. This gentle transition prevents shock and provides that last bit of nitrogen the plant needs to finish its stretch.
- Nutrient Focus: By week three, your N-P-K ratio should be shifting to favor Phosphorus (P) and Potassium (K). You’re not cutting out Nitrogen (N) completely just yet, but the focus is definitely changing. A balanced, early-bloom formula is perfect for this stage.
Think of these first few weeks as building the launchpad. The fuel you provide now sets the stage for the explosive growth that’s about to happen. For a deeper dive into this critical period, our complete guide on the cannabis flowering stage breaks down everything you need to know.
Weeks 4-7: The Peak Bud-Fattening Window
Alright, this is the main event. If you want to see your buds swell, pack on serious weight, and get that rock-hard density, these are the weeks to pay close attention. Your plants have finished stretching and are now pouring every ounce of energy into flower production. Their appetite for Phosphorus and Potassium is at an all-time high.
This is the perfect time to bring in any PK boosters or supplements designed to bulk up your buds. A pro tip: always start with a lower dose than what the bottle recommends. You can slowly ramp it up, keeping a close eye on the leaf tips for any signs of nutrient burn.
This window is where the magic really happens. Bud development isn’t random; weeks four through seven are when plants stack the most floral mass. The ideal nutrient ratio flips from a veg-stage 2-1-3 (N-P-K) to a bloom-focused 1-2-3, mirroring the plant’s shift in priorities from building structure to building flowers.
Weeks 8 to Finish: Ripening and Flushing
As you round the final corner, your plant’s needs start to wind down. The buds aren’t really getting bigger anymore; they’re ripening. This is when they develop the cannabinoids and terpenes that determine their final potency and aroma. Pushing heavy nutrients at this point can actually do more harm than good.
The goal now is to prepare the plant for a clean harvest by flushing out any leftover nutrient salts from the medium.
- Start Tapering: About two to three weeks before you plan to harvest, begin cutting back the concentration of your nutrient solution with every feeding. This acts as a signal to the plant that its life cycle is coming to an end.
- The Final Flush: For the last one to two weeks, stop feeding nutrients entirely. Give your plants nothing but plain, pH-balanced water. This forces them to use up any stored nutrients, which makes a world of difference in the final taste and smoothness of your product.
- Watch Your Trichomes: Get yourself a jeweler’s loupe or a small microscope and start checking the trichomes on the buds. Once they go from clear to mostly milky-cloudy with a few amber ones mixed in, you’re in the harvest window.
This final step is non-negotiable if you’re after top-shelf quality. Skipping the flush can leave you with a harsh, chemical-tasting product, and that would be a shame after all your hard work. Timing this right ensures your harvest is not only huge but also incredibly clean and enjoyable.
Beyond NPK: The Supplements That Pack on Bud Weight
While Nitrogen, Phosphorus, and Potassium get all the attention, they don’t work alone. A handful of key supplements can turn a good harvest into a truly massive one. Think of NPK as the gas pedal; these supplements are the turbocharger and high-octane fuel that unlock your plant’s full genetic power.
So many growers tunnel-vision on P and K during the flowering stage that they forget about the other players. These secondary nutrients and additives work behind the scenes, making sure your plant can actually use the main fertilizers to build bigger, denser buds.
The Unsung Heroes: Calcium, Magnesium, and Sulfur
You’ll often hear Calcium (Ca), Magnesium (Mg), and Sulfur (S) mentioned together, and for good reason. They are absolutely critical for bud development, and a shortage of any one of them can stop your plant’s progress in its tracks.
Calcium (Ca) is like the rebar in your plant’s foundation. It strengthens cell walls, building thick stems and branches that can physically support the weight of heavy flowers. Without enough calcium, plants can get flimsy and struggle to hold up their own colas.
Magnesium (Mg) is the heart of the chlorophyll molecule. It’s the engine of photosynthesis, driving the process that turns light into pure energy for bud production. If you see yellowing between the leaf veins, it’s often a sign of a magnesium deficiency that can bring flowering to a screeching halt.
Sulfur (S) is a key ingredient for producing terpenes and amino acids. It directly influences the final aroma and flavor profile of your buds. Simply put, more sulfur often leads to a smellier, more flavorful harvest.
Most experienced growers run a “Cal-Mag” supplement through their entire cycle. This is especially true if you’re using reverse osmosis (RO) water, which is stripped of minerals, or growing in coco coir, which has a notorious appetite for calcium.
Don’t sleep on your secondary nutes. They might not be in the spotlight like NPK, but they are the crew that makes the show run. A steady supply of Calcium and Magnesium keeps the plant’s internal highways clear, allowing it to rush P and K right to the budding sites where you need them.
Strategic Supplements That Are Worth the Money
The hydro store shelves are packed with bottles promising the world, but a few key supplements have proven their value over and over again. These aren’t magic potions; they’re targeted tools that support specific biological functions for packing on weight and density.
Silica for Structural Strength
If I had to pick one non-NPK supplement, it might be silica. Plants use it to build up and reinforce their cell walls, resulting in visibly thicker stalks and tougher branches. This becomes incredibly important in mid-to-late flower when your buds start getting seriously heavy.
Sturdier branches can support monster colas without flopping over or snapping, allowing them to swell to their absolute maximum. As a bonus, silica also makes your plants tougher and more resistant to stress from heat, pests, and drought.
Carbohydrates and Microbes
Adding simple sugars, like unsulfured blackstrap molasses, is a classic trick for a reason. You’re not feeding the plant directly—you’re feeding the army of beneficial microbes in the soil. When this microbial life is thriving, it works to make nutrients more available for your plant’s roots to absorb.
Healthy bacteria and fungi break down complex compounds into easy-to-eat meals for your plant. It’s an indirect but powerful way to boost nutrient uptake and, ultimately, bud size. Of course, you need the right genetics to begin with. Starting with proven high-yield cannabis strains is the first and most important step for any grower aiming for a massive harvest.
Enzymes for a Healthy Root Zone
Enzyme products are another fantastic tool for your arsenal. These proteins act like a cleanup crew for your root zone, breaking down old, dead root material. This process does two things: it turns that dead organic matter into a free source of food for your plant and clears out space for new, healthy roots to grow.
A clean, thriving root system is the foundation of a healthy plant. Better roots mean better nutrient absorption, which is exactly what you need to grow bigger buds.
Choosing Your Nutrients: Organic vs. Synthetic

When it comes to feeding your plants, you’ll face a big fork in the road: do you go organic or synthetic? There’s no single right answer here. The best choice really boils down to your growing style, your ultimate goals, and just how hands-on you want to get.
Both methods can grow some seriously impressive buds, but they take completely different routes to get there.
Synthetic nutrients, often called “salts,” are like giving your plants a direct IV drip. All the minerals are immediately available for the roots to soak up, which gives you incredibly fast results and pinpoint control over their diet.
Organic nutrients, on the other hand, are all about the long game. Instead of feeding the plant directly, you’re feeding the tiny ecosystem of microbes in your soil. These little guys break down the organic matter into nutrients the plant can actually use, creating a slower, more buffered feeding cycle.
The Case For Synthetic Nutrients
If your main goal is squeezing every last gram of yield out of your plants and you love dialing in your feeding schedule with precision, synthetics are tough to beat. Because the minerals are ready to go, plants can absorb them almost instantly. This means you can fix a deficiency in a flash and really push your plants hard during that crucial bud-fattening phase.
Of course, that speed and control come with a catch. The risk of nutrient burn and salt buildup in your soil or coco is much, much higher. It’s incredibly easy to overdo it with synthetics, which can stress your plants out and lock them out from absorbing other vital nutrients.
Synthetic nutrients offer a direct line to plant nutrition, completely bypassing the soil food web. This is why they are the go-to for most hydroponic systems, where the grower has to supply 100% of the plant’s diet in a water-based solution.
The Organic Approach To Growing
Going organic is all about cultivating a rich, living soil that takes care of the plant for you. Think of it like building a healthy gut biome for your garden. You’re counting on beneficial bacteria and fungi to do the heavy lifting, breaking down amendments like bone meal, kelp, and worm castings into plant-ready food.
This method is far more forgiving. The slow-and-steady release of nutrients makes it much harder to burn your plants. Plus, many experienced growers will tell you that organic buds have a noticeably better flavor and aroma, thanks to the complex profile of compounds the plant receives, not just isolated mineral salts.
- The upside: Superior taste and smell, very low risk of nutrient burn, and you build incredible soil over time.
- The downside: It’s a slower process, can feel less precise, and might not produce the same monster yields as a perfectly dialed-in synthetic grow.
Ultimately, the choice is yours. Are you a data-driven grower chasing sheer size and speed? Or do you prefer a more natural, forgiving process that puts the focus on quality and flavor?
To help you decide, here’s a quick breakdown of how the two stack up.
Organic vs. Synthetic Nutrients: A Quick Comparison
This table highlights the fundamental differences between organic and synthetic nutrient lines, which should make it easier to see which one fits your setup and philosophy.
| Feature | Organic Nutrients | Synthetic Nutrients |
|---|---|---|
| Nutrient Availability | Slow-release; microbes must break them down first. | Immediately available for plant uptake. |
| Risk of Burn | Very low; the process is naturally buffered. | High; easy to overfeed and cause salt buildup. |
| Impact on Soil | Builds a rich, living soil ecosystem over time. | Can deplete soil life and lead to salt accumulation. |
| Control & Precision | Less precise; relies on biological processes. | Highly precise; allows for exact nutrient ratios. |
| Best For | Growers prioritizing flavor, soil health, and a forgiving process. | Growers aiming for maximum yield, fast results, and hydroponics. |
Whichever path you take, understanding how each one works is what matters. Synthetics give you direct, hands-on control over the plant’s diet. Organics put you in charge of the ecosystem that feeds the plant. Both are powerful tools for growing bigger, better buds when you know how to use them.
Common Nutrient Problems and How to Fix Them
Even with the best nutrients and a killer feeding schedule, things can still go sideways. Your plants are always talking to you through their leaves, and learning to read those signals is what separates the novices from the pros. Most of the time, when a flowering plant looks sick, it boils down to two main culprits: nutrient burn or nutrient lockout.
The good news? Both are completely fixable if you catch them early. The trick is to act fast and know what you’re looking at so you can turn a potential disaster into a minor speed bump.
Identifying and Correcting Nutrient Burn
Nutrient burn is probably the most common mistake growers make, especially when they’re excited to push for bigger buds with powerful bloom boosters. It’s really just a simple case of overfeeding—giving your plant more than it can handle, which creates a toxic buildup of mineral salts in the soil.
The tell-tale sign is yellowing or browning at the very tips of the fan leaves. If you let it go, that “burn” will slowly creep inward from the leaf tips, and you might see the leaves curl down into a “claw” shape.
If you spot this, don’t panic. The fix is pretty straightforward:
- Stop all feeding. Right away. The first thing is to cut off the nutrient supply completely until the plant recovers.
- Flush the medium. You need to wash out all those excess salts. Drench the pot with plain, pH-balanced water until you get a heavy runoff. A good rule of thumb is to use a volume of water that is two to three times the size of the container.
- Ease back into feeding. After the flush, let the medium dry out a bit. When it’s time to feed again, start with a much weaker mix—go for about half-strength of your previous formula. You can slowly ramp it back up, but only if the plant looks happy and shows no more signs of stress.
Nutrient burn is a classic case of “too much of a good thing.” It’s your plant’s way of screaming that it’s overwhelmed. A quick flush is like hitting the reset button for your soil, giving the roots a clean slate.
Understanding and Fixing Nutrient Lockout
Nutrient lockout is a bit trickier and often gets misdiagnosed. This is when the nutrients are right there in the soil, but your plant can’t absorb them for some reason. It’s an incredibly frustrating situation, and the number one cause is an off-kilter pH level at the roots.
When the pH of your medium or water strays outside the sweet spot—that’s around 6.0-6.8 for soil and 5.5-6.5 for hydro/coco—certain minerals become chemically unavailable. The plant will start showing deficiency symptoms, like yellowing leaves or purple stems, even though you know you’re feeding it a complete diet.
Fixing lockout is a two-part mission:
- Flush the System: Just like with nute burn, the first move is a thorough flush with pH-balanced water. This not only washes away salt buildup but also helps reset the pH of the entire medium.
- Rebalance and Re-feed: This next step is critical. After flushing, you have to make sure your next feeding is at the perfect pH. Always test the pH of your nutrient solution after you’ve mixed everything in, because fertilizers can throw it off. Start back with a properly balanced, half-strength solution to be safe.
Dialing in your watering routine is also a huge part of preventing these problems from popping up in the first place. For a deeper dive, check out our guide on how often to water weed plants to help you build a healthier root zone from the ground up.
A massive harvest always starts with killer genetics. At Liberty Seed Bank, we’ve got the premium cannabis seeds that lay the foundation for an incredible grow. Find your next high-yielding monster at https://libertyseedbank.com.
FAQs
Are “PK Boosters” Really Worth the Money?
Strictly necessary? No, not if you have a top-tier base nutrient line. But are they effective? Absolutely. Think of them as a turbo-charge for your buds right when they need it most.
These boosters deliver a massive, targeted shot of Phosphorus (P) and Potassium (K) during that critical mid-to-late flower period when the plant’s appetite for these minerals is off the charts. Used correctly, a good PK booster can add some serious weight and density to your final harvest.
If you go for it, just remember the golden rule: start low and go slow. Begin with a quarter or half of the recommended dose and watch how your plants respond before you even think about increasing it. Nutrient burn is no joke.
How Can I Tell if My Buds Are Still Swelling?
Your eyes are your best tool here. Get in there and look at your plants every day. You’ll see the most dramatic growth spurt during the middle of the flowering stage, usually somewhere between weeks four and seven. During this peak window, you can practically see them getting fatter overnight.
As you get closer to harvest, this explosive growth will taper off. A key sign that the fattening phase is wrapping up is when the pistils (the white hairs) stop popping up everywhere and start to darken, shifting to shades of orange, amber, or brown. That’s your plant telling you it’s ripening and focusing on finishing up.
What’s the Perfect pH for Flowering Plants?
This isn’t a “one-size-fits-all” answer. The right pH is mission-critical for nutrient absorption, and the magic number depends entirely on what you’re growing in.
Soil: You have a bit more wiggle room here. Keep it between 6.0 and 6.8. The organic matter in soil acts as a nice buffer.
Hydroponics & Coco Coir: These systems are way more sensitive. You need to be more precise, aiming for a slightly more acidic range of 5.5 to 6.5. Check it daily.
Can I Just Keep Using My Veg Nutrients in Flower?
I hear this one a lot, especially from new growers trying to keep things simple. The short answer is a hard no. It’s a bad idea.
Vegetative nutrients are loaded with Nitrogen (N), which is exactly what your plants need to push out tons of leafy growth. But once those flowers start forming, that same high nitrogen level works against you. It can actually stunt bud development, leading to small, airy flowers with a harsh, grassy taste. Do yourself a favor and switch to a proper bloom formula as soon as you see those first little white hairs.




No Comments