

How to Raise pH in Water for Thriving Cannabis Plants
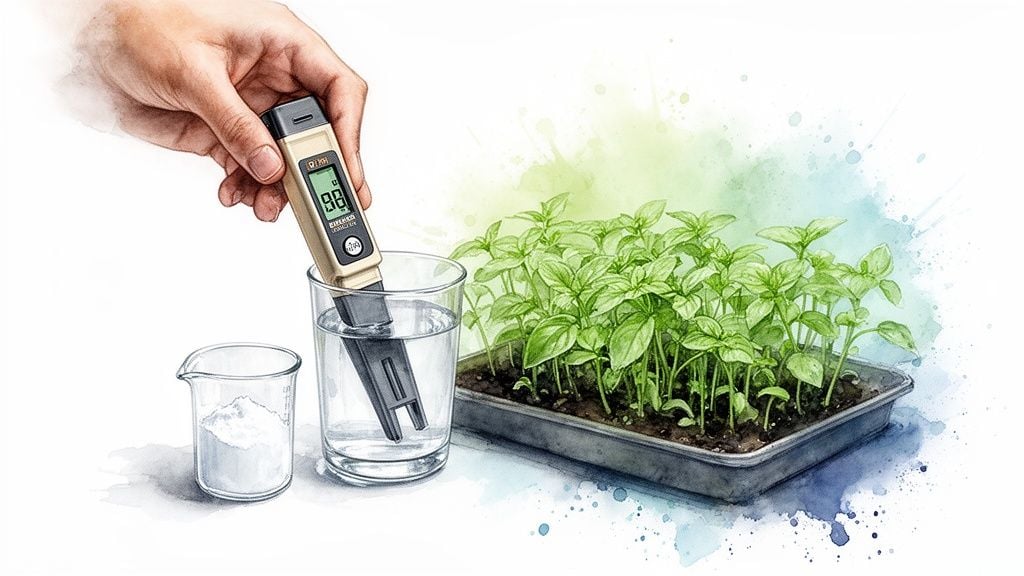
Ready to raise the pH in your water? It’s pretty straightforward. Just add a small amount of an alkaline substance—like potassium bicarbonate or a commercial ‘pH Up’ solution—after you’ve mixed in all your nutrients. Then, give it another test to make sure you’ve landed in that sweet spot for your grow. This one simple step is often the difference between a struggling plant and one that’s thriving.
Why Water pH Is the Key to Nutrient Uptake
Here’s a good way to think about it: your plant’s roots are a locked door, and the nutrients you provide are the key. The pH level of your water is what actually controls that lock. When the pH is just right, the door swings open, and your cannabis plants can feast on all the food they need to flourish.
But if the water gets too acidic (meaning a low pH), that door slams shut. This is what growers call nutrient lockout, and it’s one of the most common headaches you can face. Your plants are essentially starving in a sea of plenty. You can be feeding them the best nutrients for bigger buds, but it won’t matter because their roots simply can’t absorb them.
What Happens When pH Is Too Low
You’ll start to see the fallout from low pH pretty quickly. The signs often look like a nutrient deficiency, which can trick growers into adding even more fertilizer—making the problem worse. If left unchecked, it can seriously jeopardize your harvest.
Watch out for these classic symptoms of acidic water:
- Yellowing Leaves (Chlorosis): This is usually the first red flag. It happens when the plant can’t get enough magnesium and calcium.
- Stunted Growth: Without access to crucial macronutrients like nitrogen and phosphorus, your plants just won’t develop strong stalks or full, leafy canopies.
- Burnt-Looking Leaf Tips: Overly acidic conditions can make certain micronutrients, like manganese, so available that they become toxic to the plant.
It’s also important to remember that the pH scale is logarithmic. A seemingly small drop of just 1.0 pH unit actually represents a 10-fold increase in acidity. So, water at pH 5.0 is ten times more acidic than water at pH 6.0. That’s a huge jump.
Grower’s Tip: Small, consistent pH adjustments can unlock massive gains in plant health and yield. Honestly, ignoring your water’s pH is like leaving your harvest potential on the table. It’s the single most impactful variable you have easy control over.
Finding the Sweet Spot for Cannabis
The ideal pH window for your plants really boils down to your growing method. Soil acts differently than a hydroponic setup, so you have to adjust your targets accordingly. Nailing the right range ensures every nutrient you provide is actually available for your plants to use.
Here’s a quick guide to the target pH levels for cannabis, whether you’re growing in soil or a soilless medium.
Ideal pH Ranges for Cannabis Cultivation
| Growing Medium | Optimal pH Range | Why It Matters |
|---|---|---|
| Soil | 6.0 – 7.0 | Soil has natural buffers that help resist big pH swings, making it a bit more forgiving for beginners. |
| Hydroponics | 5.5 – 6.5 | In hydro, you have direct access to the roots, so precise pH is critical for immediate nutrient absorption. |
| Coco Coir | 5.5 – 6.5 | Like hydro, coco is an inert medium. You’re in complete control of the root zone’s environment. |
As you can see, the targets are pretty specific. Sticking to these ranges is fundamental to a successful grow, preventing lockout and keeping your plants happy and well-fed.
Getting an Accurate pH Reading: Your First and Most Important Step
Before you even think about adjusting your water’s pH, you have to know where you’re starting from. Guessing is not a strategy—it’s a fast track to nutrient lockout and a world of frustration.
Fortunately, getting a reliable measurement is straightforward. You’ve got a few solid options, and the right one for you will come down to a balance of precision, price, and how serious you are about your grow.
Your Toolkit: From Basic to Pro
The most common tools you’ll see are pH test strips, liquid test kits, and digital pH pens. While cheap strips and kits have their place, for anyone looking for consistent results, a digital pen is pretty much non-negotiable.
Let’s look at the good and the bad of each.
- Paper Test Strips: These are the cheapest and simplest option. You dip a strip, it changes color, and you try to match it to a chart. The problem is, matching that color can be really subjective. Is it 6.2 or 6.6? It’s hard to tell, and that difference matters to your plants.
- Liquid Test Kits: A definite step up. You add a few drops of reagent to a water sample, and the whole sample changes color. It’s easier to see a clear color change than on a tiny strip, but you’re still relying on your eyes to interpret the results. Better, but not perfect.
- Digital pH Pens: This is the gold standard for a reason. You stick the pen in your water, and you get a precise numerical reading, often down to two decimal places. There’s no guesswork. They cost more upfront, but they pay for themselves by helping you avoid costly mistakes.
I made the switch to a digital pen after my first grow and never looked back. It’s a game-changer. The confidence you get from knowing your reading is spot-on is priceless, especially when you need to raise the pH in your water just right.
Keep Your Digital Pen Honest
A digital pen is an incredible tool, but it’s only as good as its last calibration. If your meter is off, it can give you dangerously wrong readings, causing you to “fix” a problem that doesn’t exist and create a real one. A little maintenance goes a long way.
To keep your readings trustworthy, just build this simple routine:
- Calibrate Often: Use proper calibration solutions (usually pH 4.0 and 7.0) when you first get the pen and then at least once a month after that. If you drop it, calibrate it. If the readings seem weird, calibrate it.
- Rinse, Rinse, Rinse: Always rinse the electrode with distilled or deionized water before and after you stick it in anything. This prevents gunk from your nutrient solution from messing up your next reading.
- Store It Right: Never let the electrode dry out. Most pens come with a cap that you’ll fill with a few drops of storage solution. This keeps the sensitive probe hydrated and ready to go.
When to Test Your Water
Timing is everything. The absolute best time to check your pH is after you’ve added all your nutrients, but right before you water your plants. Why? Because nutrients are almost always acidic and will dramatically drop the pH of your starting water.
Testing your plain tap water is a good starting point, but testing the final nutrient solution is what truly matters.
Make it a habit to check the pH before every single feeding. For hydroponic systems, you’ll want to check the reservoir daily, as pH can drift up or down as your plants eat. Catching these swings early is the key to preventing problems before they ever start.
Choosing Your pH Up Solution: Natural vs. Commercial
So, your test strips or meter just told you the water is too acidic. Now what? The next step is picking the right tool to nudge that pH back up into the sweet spot. You’ve got a few solid options, from stuff you probably have in your kitchen right now to professional-grade solutions made for growers.
Which one you choose really comes down to your budget, your growing style, and how much stability you need. Let’s break down the pros and cons of each so you can make the right call for your garden.
The Natural Approach: Using Household Staples
If you prefer organic methods or just need a quick fix, a couple of common household items can do the trick. These are fantastic for their low cost and availability, especially for smaller soil grows where the medium offers a bit more of a buffer.
Most people first think of baking soda (sodium bicarbonate). It’s cheap, you have it, and it works. But there’s a big catch for serious growers: sodium. Using it repeatedly can cause sodium to build up in your soil or medium, which can lock out other nutrients and eventually harm your plants.
A much better choice is potassium bicarbonate. It raises pH just like baking soda, but instead of adding potentially harmful sodium, it provides potassium—a vital nutrient your plants crave. This makes it a far safer option for long-term health, no matter your growing system.
A Quick Tip for Dosing: When using potassium bicarbonate, less is more to start. Try about 1/4 teaspoon per 5 gallons of water. Dissolve it completely, give it a good stir, and let it sit for about 15 minutes before you test again. This slow-and-steady method keeps you from accidentally overshooting your target pH.
Why Commercial pH Up Is the Grower’s Choice
While natural methods have their place, most experienced growers keep a bottle of commercial pH Up on their shelf. These products are engineered specifically for horticulture, offering a level of stability and potency that household items just can’t match.
These liquids are typically made with potassium hydroxide or potassium silicate. Both are strong, stable bases that give you a quick, reliable pH bump. Potassium silicate even offers the bonus of providing silica, an element that helps strengthen plant cell walls and makes them more resilient to stress.
The biggest win here is predictability. Once you use a specific product a few times, you’ll know that a certain number of drops will produce a consistent result in your nutrient mix. This kind of reliability is absolutely critical in hydroponics, where roots are immediately exposed to any change you make.
This precision is similar to what happens in large-scale water treatment. Professionals at municipal facilities use carefully measured alkaline compounds to neutralize acidic water, ensuring it’s safe for public use. You can learn more about how pH control is managed in water treatment on a larger scale.
Comparing Common pH Up Methods
Still on the fence? Sometimes seeing everything laid out side-by-side makes the decision easier. This table breaks down the key differences to help you choose the best fit for your setup.
| Method | Active Ingredient | Pros | Cons / Risks |
|---|---|---|---|
| Baking Soda | Sodium Bicarbonate | Very cheap and widely available. | Adds unwanted sodium, which can become toxic to plants over time. |
| Potassium Bicarbonate | Potassium Bicarbonate | A safer organic choice that adds beneficial potassium. | Less concentrated than commercial options; requires larger amounts. |
| Commercial pH Up | Potassium Hydroxide or Silicate | Highly concentrated, stable, and predictable. Formulated for growing. | More expensive upfront and requires careful handling (caustic). |
In the end, for growers serious about getting the best results and maintaining a perfectly stable root zone, a commercial pH Up solution is a worthwhile investment. It takes the guesswork out of the equation and eliminates the risks that come with DIY methods, giving you total control over one of your garden’s most important variables.
Getting Your Nutrient Solution Just Right
Alright, so you know your pH is too low and you’ve got your pH Up ready. That’s a great start. Now, let’s walk through the actual process of adjusting your water or nutrient solution. The key here is developing a consistent routine. Once you get it down, managing pH becomes second nature instead of a chore.
Before you even think about mixing, get everything you need in one place. Your water container, nutrients, supplements, pH Up solution, and your trusty pH meter should all be within arm’s reach. Trust me, it’s a pain to stop halfway through to find something.
The Golden Rule of pH Adjustment
If you remember one thing from this guide, let it be this: always, always add your nutrients before you adjust the pH.
Nutrients are almost always acidic and will tank the pH of your water as soon as you mix them in. If you pH your water first, you’ll just have to do it all over again after adding the nutes. Sticking to this order of operations saves you time, product, and a whole lot of frustration. Once everything is dissolved, you’ll get a true reading of what you’re about to feed your plants, and you can make one precise adjustment.
Master the “Add, Stir, Wait, Test” Method
The most common mistake I see new growers make is overshooting their target pH. It happens in a flash, especially with concentrated commercial products. A few extra drops can send your pH from 5.8 to 7.5, and then you’re stuck trying to bring it back down with pH Down. It’s a stressful seesaw you want to avoid.
The secret to avoiding this is a simple mantra: “add, stir, wait, test.”
- Start Small: Add way less pH Up than you think you need. For a five-gallon bucket, I’m talking about a few drops or a tiny pinch of powder. You can always add more.
- Mix It Up: Stir the solution really well for at least 30-60 seconds. You need to make sure the adjuster is fully distributed, otherwise you’ll get a false reading.
- Give It a Minute: The chemical reaction isn’t instant. Let the solution sit and stabilize for a minute or two before you test.
- Check Again: Pop your pH pen back in and see where you’re at. Still too low? Repeat the process with another tiny addition.
This patient, step-by-step approach is what separates the pros from the rookies. It’s how you nail your pH every single time. For more tips on building these kinds of solid routines, our guide on how often to water weed plants is a great next read.
A Lesson Learned the Hard Way: Early on, I dumped a whole milliliter of pH Up into a five-gallon bucket of RO water. The pH shot from 5.5 to over 8.0 instantly. I spent the next 20 minutes playing chemist trying to fix it. Now, I use a dropper and add literally one drop at a time. No more stress.
How Your Water Source Changes the Game
Not all water is the same, and your starting water source will completely change how you approach pH adjustments.
- Reverse Osmosis (RO) Water: This is pure, empty water with no minerals. That means it has zero buffering capacity. The pH will swing dramatically with the tiniest amount of pH adjuster. You have to be incredibly gentle and work in micro-doses.
- Tap Water: Hard tap water is the complete opposite. It’s full of minerals like calcium and magnesium, which act as a natural buffer. This buffer resists pH changes, so you’ll likely need to use a lot more pH Up to get it to move.
Once you get a feel for how your water behaves, you’ll be able to anticipate how much you need to add. This is where the real skill comes in—knowing your system inside and out gives you total control over what your plants are eating.
Troubleshooting Common pH Headaches

Even when you’re careful, pH can still throw you a curveball. One of the most common headaches is pH drift. You’ll mix a batch of nutrients, dial it in perfectly, and then come back a day later to find the pH has plummeted.
This isn’t your fault—it’s just nature at work. As your plants drink and eat, their roots release ions that can make the water more acidic. Microbial life in the reservoir also contributes. If you see the pH dropping day after day, don’t sweat it. Just make it part of your daily routine to test and bump it back up into the sweet spot.
When Your pH Refuses to Move
Ever feel like you’re dumping in pH Up and the meter just isn’t budging? Chances are, you’re wrestling with highly buffered water. This is a classic sign of hard tap water, which is loaded with minerals like calcium and magnesium that fight against any changes in pH.
You’ve got a couple of ways to handle this:
- Be patient and persistent. You’ll simply need to use more pH adjuster than a grower using RO water. Just stick with the “add, stir, wait, test” routine until you hit your number.
- Cut your water. Diluting your tap water with reverse osmosis (RO) or distilled water is a great way to lower its buffering capacity, making the whole process much smoother.
Another thing that can drive you crazy is a digital pen giving you jumpy, erratic readings. Before you start questioning your water or your sanity, check the meter itself. Nine times out of ten, a bouncing reading just means the pen is due for a good cleaning and calibration.
Pro Tip: We’ve all done it—overshot the target and sent the pH way too high. The knee-jerk reaction is to grab the pH Down, but don’t. A better move is to dilute the solution with some fresh, plain source water. Then, you can slowly add a bit more of your nutrient mix to gently guide the pH back down. This avoids the wild chemical swings that can really stress out your plants.
Stabilizing Your Solution From the Start
Knowing how to fix pH problems is good, but avoiding them in the first place is even better. A simple but effective trick is to let your tap water sit out for 24 hours before you even think about mixing nutrients. This lets chlorine gas off and helps stabilize the starting pH.
Using a pH adjuster with potassium silicate can also help. The silica provides an extra buffer, which can seriously cut down on those frustrating daily swings. Getting a handle on these details is just as crucial as knowing how many leaves a weed plant should have, and it’s what separates the good growers from the great ones.
Ready to take the guesswork out of your grow? At Liberty Seed Bank, we offer a huge selection of premium, reliable seeds perfect for any setup. Find the ideal strain for your garden and start your journey to a perfect harvest today at https://libertyseedbank.com.
FAQs
Why Does My pH Keep Dropping?
If you’re adjusting your water pH only to see it drop again a day later, you’re dealing with something called pH drift. Don’t worry, it’s a completely normal part of the process.
A few things are usually at play here:
Plants Eating: As your plants absorb nutrients, their roots release compounds that can make the water more acidic.
Microbe Party: All the beneficial microbes living in your root zone or reservoir are constantly doing their thing, and their metabolic processes can also affect pH.
Fertilizer Choice: The specific type of nitrogen and other elements in your nutrient mix can naturally cause the pH to swing one way or the other as it gets used up.
The best way to handle pH drift is to just make it part of your daily routine. Check your reservoir’s pH every day and make small tweaks as you go. Some growers find that using a pH adjuster with potassium silicate helps buffer the solution, making it more resistant to these daily swings.
Can I Use Wood Ash to Raise pH?
Technically, yes, wood ash is alkaline. But should you use it for your plants? I’d give that a hard no.
While it does contain potassium and will raise pH, wood ash from your fireplace is incredibly inconsistent. You never know exactly what’s in it, which makes getting a precise dose a complete guessing game. It’s better for slowly amending a large outdoor garden bed over many months.
For container growing or hydro, it’s just too messy and unpredictable. It can easily clog up pumps and drip lines, creating a whole new set of headaches. Your best bet is to stick with something reliable like potassium bicarbonate or a purpose-built pH Up solution.
Predictability is everything in a good grow. Your plants crave stability. Throwing something as random as wood ash into the mix introduces variables that can quickly lead to nutrient lockout and other problems.
How Much Baking Soda Should I Use For a Gallon of Water?
This is a classic question, and the honest answer is: it depends. There’s no universal recipe, but a good starting point is about 1/4 teaspoon per gallon of water. Think of this as a baseline, not a rule.
The real driver here is your water’s unique chemistry. Some water is “softer” and changes pH easily, while other water is “hard” and resists change. The only way to know for sure is to add a tiny amount, stir it in really well, and test again. You’ll have to repeat this little dance until you land in that sweet spot.




No Comments