

Your Guide to the Vegetative Stage Weed Growth Cycle
Growing
After your cannabis seeds have sprouted, the real fun begins. Your plant is now entering its vegetative stage—a period of explosive, leafy growth that lays the groundwork for a massive harvest.
What Is the Vegetative Stage and Why It Matters
Think of your plant like a skyscraper in the making. Before you can even dream of the impressive penthouse suites—your future buds—you have to build a rock-solid foundation and a sturdy steel frame. The vegetative stage of weed is precisely that. It’s all about building the structure.
During this time, your plant has one job: get big. It won’t produce a single bud. Instead, it channels all its energy into pure structural growth.
- Building a powerful root system: This is the plant’s engine room, pulling up all the water and nutrients it needs to thrive.
- Developing strong stems and branches: This framework has to be tough enough to hold up heavy, dense colas without snapping.
- Growing tons of fan leaves: These are the solar panels, soaking up light and converting it into fuel for the entire operation.
Skimping on the vegetative stage is like trying to build that skyscraper on a shaky foundation. A longer, healthier veg period means a bigger, stronger plant, which almost always translates to a bigger final yield.
The Timeline of Vegetative Growth
So, how long does this phase last? The good news is, you’re mostly in control. The vegetative stage can run anywhere from 3 to 16 weeks, depending on your goals and the specific strain you’re growing.
Most indoor growers let their plants veg for about 4-6 weeks to get them to a manageable yet productive size before flipping the switch to flowering. In the right conditions, a healthy plant can shoot up as much as two inches per day as it expands its root network to hoover up nutrients. To see where this fits in the grand scheme, it helps to understand the full cannabis life cycle and its different stages.
Before we dive deeper into the specifics, here’s a quick overview of what you’ll be focused on during this critical growth period.
Vegetative Stage at a Glance
This table breaks down the main goals and ideal conditions you’ll be aiming for.
| Key Component | Primary Goal | Ideal Environment |
|---|---|---|
| Light | Fuel explosive foliage and structural growth. | 18+ hours of light per day (18/6 cycle is standard). |
| Nutrients | Provide the building blocks for stems and leaves. | High in Nitrogen (N) for green, leafy growth. |
| Training | Shape the plant for maximum light exposure and yield. | Topping, LST, and SCROG to create an even canopy. |
| Duration | Increase the plant's overall size and budding potential. | 3-16 weeks, controlled by the grower (for photoperiods). |
This stage is your chance to play architect and build the perfect framework for a truly impressive harvest.
The vegetative stage is your opportunity to shape the plant’s destiny. Every branch you train and every week you add to this phase is an investment in the final weight and quality of your harvest.
By giving your plant the time and attention it needs now, you’re not just growing leaves—you’re setting yourself up for the kind of results every grower hopes for.
Creating the Perfect Environment for Vegetative Growth
Light is, without a doubt, the most important factor here. Your goal is to convince your plant it’s living through the longest, sunniest days of summer. That’s why the 18/6 light cycle is the go-to standard for growers everywhere. This simply means providing 18 hours of consistent light followed by 6 hours of total darkness.
This extended “daylight” period powers photosynthesis, giving your plant all the energy it needs to develop a thick canopy and strong branches. Some growers might push for 24 hours of light, but I’ve found that a short, dark rest period helps the plant’s roots and overall health. A cheap outlet timer is your best friend here; set it once and forget it.
Mastering Light Intensity
It’s not just about how long the lights are on; the intensity matters just as much. Modern LED grow lights are fantastic because they’re efficient and don’t produce a ton of heat, unlike the old-school High-Pressure Sodium (HPS) bulbs. Honestly, though, any quality grow light will get the job done if you use it right.
The goal is to hit the “sweet spot” of light exposure. This is scientifically measured as the Daily Light Integral (DLI), and for vegging cannabis, the target is 20–40 mol/m²/day.
Don’t get bogged down by the DLI science. Here’s the practical takeaway: watch your plants. If the leaves start curling up at the edges and look like little tacos, your light is either too intense or too close. Back it off a bit and see how they respond.
Temperature and Humidity: The Dynamic Duo
The air in your grow room is just as important as the light. Your plant breathes through its leaves, and the balance of temperature and humidity determines how well it can absorb water and nutrients from the roots. Get this balance right, and you’ll see a noticeable difference in growth.
For the vegetative stage, here are the numbers to shoot for:
- Temperature: 70–85°F (21–29°C)
- Humidity: 40–60% RH (Relative Humidity)
This combination creates a healthy Vapor Pressure Deficit (VPD), which is a fancy way of saying it creates the perfect conditions for the plant to “pull” water up from its roots. A small, oscillating fan is a must-have. It keeps the air moving, prevents hot spots, stops mold in its tracks, and even strengthens the stems as they gently sway.
For those just starting out with tiny seedlings, you can fine-tune these conditions even further. We cover this in our guide on how much light cannabis seedlings need.
How to Feed Your Plants for Vigorous Growth

Think of your plant in the vegetative stage as a teenager going through a massive growth spurt—it’s always hungry. To build the strong frame needed to support heavy buds later, your plant needs a consistent and correct diet right now. Getting the nutrients right is one of the most important skills you can master as a grower.
The foundation of any plant diet is its macronutrients: Nitrogen (N), Phosphorus (P), and Potassium (K). During the vegetative stage of weed, Nitrogen is king. It’s the main ingredient for chlorophyll, which powers photosynthesis and gives your plants their vibrant green color. Without enough nitrogen, your plant can’t build the leafy solar panels it needs to grow big and strong.
Understanding N-P-K Ratios
When you start shopping for plant food, you’ll see three numbers on every bottle, like “5-2-3” or “6-4-4.” This is the N-P-K ratio, and it tells you the percentage of those key nutrients in the mix. For veg, you’re looking for a bottle with a high first number—that’s your Nitrogen.
- Nitrogen (N): The most important nutrient for veg. It fuels all that lush, leafy growth.
- Phosphorus (P): This plays a key role in developing a healthy root system and helping the plant transfer energy.
- Potassium (K): Think of this as the all-rounder. It helps with overall plant health and strengthens its defenses.
While NPK gets most of the attention, don’t forget about micronutrients like Calcium, Magnesium, and Iron. They’re needed in much smaller amounts, but they’re still vital. Thankfully, most good nutrient lines already include them. If you ever see the lower leaves on your plant starting to turn yellow, that’s the classic sign it’s crying out for more Nitrogen.
The single biggest mistake new growers make is overfeeding. It’s always better to give too little than too much. Your plant will give you signals when it’s hungry—you just have to learn to read them.
Creating a Smart Feeding Schedule
Whether you go with synthetic or organic nutrients, having a schedule is key. Most brands give you a feeding chart, but treat it as a suggestion, not gospel. A golden rule is to start at half the recommended dose. See how your plant reacts, then slowly increase if needed. This “start low, go slow” method is the best way to avoid nutrient burn, which shows up as brown, crispy tips on your leaves.
Before you even think about mixing nutrients, check your soil. Stick your finger an inch or two deep; if it feels dry, it’s time to water. And here’s a crucial step many beginners miss: always check the pH after you mix in your nutrients. For soil, you want to keep your water’s pH level between 6.0 and 7.0. This ensures your plant can actually absorb all the good stuff you’re feeding it.
Choosing the right nutrient line can make feeding a whole lot simpler. For a deeper look at what’s out there, check out our guide on the best nutrients for bigger buds to find the perfect fit for your garden.
Plant Training Techniques to Maximize Your Yield
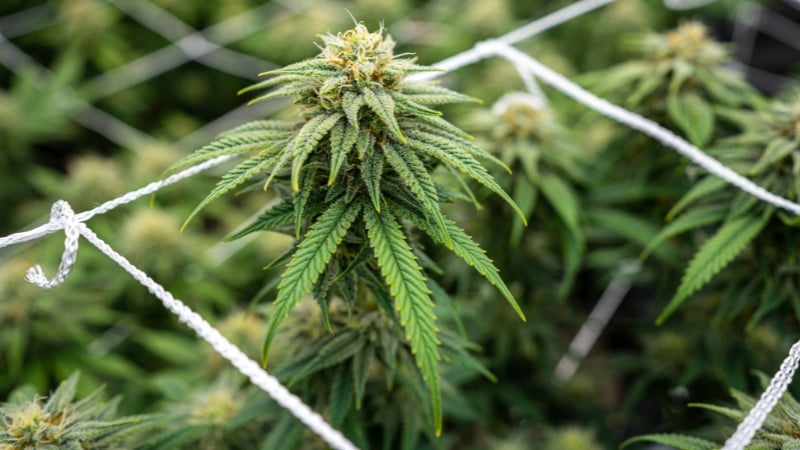
This leaves all the lower branches in the shadows, unable to develop into anything substantial. Training techniques are all about breaking this habit. You’re essentially telling the plant to spread its energy out, creating a wide, flat canopy where every bud site gets a piece of the action and an equal share of light. The vegetative stage of weed is the ideal time for this; the stems are still bendy and forgiving, and the plant bounces back from stress like a champ.
Low-Stress Training (LST) Your Way to a Wider Plant
If you’re just starting out or prefer a gentler approach, Low-Stress Training (LST) is your best friend. It’s exactly what it sounds like: a low-risk, high-reward method where you gently bend and tie down branches to encourage them to grow outwards instead of straight up. This simple trick convinces the plant to develop multiple main colas instead of just one.
Ready to give it a try? Wait until your plant has developed about 4-5 nodes (sets of leaves). Here’s how it’s done:
- Gently Bend: After watering, when the stem is flexible and less likely to snap, carefully bend the main stalk down until it’s almost parallel to your soil.
- Secure It: Use soft plant ties or garden wire to hold the stem in place, securing it to the rim of your pot.
- Repeat: As new side shoots begin to grow upwards towards the light, you’ll gently tie them down and away from the plant’s center, continuing to open up the structure.
The whole point of LST is to create a flat, open canopy. You’re not hurting the plant; you’re just guiding its growth to create a bushier shape that will produce a far more impressive and even harvest.
High-Stress Training (HST) for Explosive Growth
While LST is all about gentle persuasion, High-Stress Training (HST) uses strategic, controlled damage to trigger explosive new growth. It sounds scary, but techniques like “topping” work wonders.
Topping is simply cutting off the very top of your plant’s main stem. This single cut removes the main cola’s dominance, forcing the plant to divert growth hormones to the two nodes right below the cut. In response, those two nodes sprout into two brand new main stems.
By making one simple cut, you effectively double the number of main colas your plant will produce. This is one of the most effective ways to boost your yield potential in the vegetative stage.
For the best results, wait until your plant is strong enough to handle it, usually once it has 5-6 nodes. Make a clean cut just above the 4th or 5th node, and watch it bounce back with a vengeance.
Pairing these training techniques with a slightly longer veg period can produce incredible results. Research has shown a clear connection between veg time and yield, with one study showing production jumping from 295 g/m² with a 1-week veg to 571 g/m² with a 4-week veg. For a home grower, this means that giving your plant extra time to be trained can boost your yields by 50-90%. You can explore the full research findings on veg time and yield to see just how powerful a little extra patience can be.
Troubleshooting Common Vegetative Stage Problems
No matter how careful you are, problems will inevitably arise during the vegetative stage. We’ve all been there. The most important thing is not to panic. Your plants are constantly communicating with you—you just have to learn their language.
Think of it like being a plant detective. A yellowing leaf, a strange spot, or a drooping stem are all clues. If you can spot these signs early and trace them back to the source, most issues during the vegetative stage of weed are surprisingly simple to fix.
Identifying Pests and Diseases
Nothing ruins a good grow faster than uninvited guests. Pests and diseases love the cozy conditions of a grow room, so you need to be on constant lookout for the usual suspects.
- Spider Mites: The tell-tale sign is a pattern of tiny white or yellow dots speckling the leaves. Flip a leaf over and look for delicate, fine webbing. These pests are notorious for sucking the sap and vitality right out of your plants.
- Fungus Gnats: If you see little black flies that look like fruit flies buzzing around your soil, you likely have fungus gnats. The real damage comes from their larvae, which live in the top inch of moist soil and chew on your plant’s delicate roots.
- Powdery Mildew: This one is easy to spot—it looks just like someone sprinkled flour on your plant’s leaves. It’s a fungus that spreads quickly, smothering the leaves and preventing them from absorbing light.
For a full battle plan against these common invaders, our guide on pest control for cannabis plants will show you how to keep your garden clean from the start.
Environmental and Nutrient Issues
Sometimes the problem isn’t a bug, but the environment itself. Your plant’s symptoms can often point to issues with watering, nutrients, or heat stress. For instance, drooping leaves can mean the plant is thirsty, but it can also mean it’s drowning in overwatered soil. The only way to know is to feel the soil.
Nutrient burn is a classic sign of an overeager grower. You’ll see it as dark green leaves with crispy, burnt-looking yellow or brown tips. It’s a clear message that you’re feeding your plant way too much. The fix is to flush the soil with plain, pH-balanced water and ease up on the nutrients.
To help you quickly figure out what’s wrong, we’ve put together this problem-solver table. Use it as a quick reference to diagnose the issue and get your plants back on track.
Common Vegetative Stage Problem Solver
| Symptom | Potential Problem | Recommended Solution |
|---|---|---|
| Yellowing lower leaves | Nitrogen Deficiency | Increase Nitrogen in your feeding schedule. |
| Burnt, crispy leaf tips | Nutrient Burn | Flush soil with pH-balanced water; reduce nutrient dose. |
| Leaves curling up ("taco-ing") | Heat/Light Stress | Raise your lights or dim their intensity; improve air circulation. |
| White, flour-like spots | Powdery Mildew | Increase airflow, lower humidity, and treat with a fungicide. |
| Tiny webs under leaves | Spider Mites | Wipe leaves clean; use neem oil or insecticidal soap. |
This table covers the most frequent hiccups you’ll run into. By learning to read these signs, you’ll spend less time worrying and more time watching your plants thrive.
FAQs
What Are the First Signs My Plant Is Ready for Flowering?
Knowing when to flip to flower is one of the most crucial decisions you’ll make. You’re looking for a combination of sexual maturity and the perfect size for your space.
A classic sign of maturity is the appearance of alternating nodes. When a plant is young, its branches grow in symmetrical pairs. As it gets older, the nodes will start to stagger, with new branches popping up one at a time on alternating sides of the stem.
You should also keep an eye out for pre-flowers. These are tiny, early versions of male or female flowers that show up where the branches meet the main stem. A female pre-flower looks like a tiny teardrop-shaped pod (a calyx) with a couple of little white hairs (pistils) sticking out. Seeing these tells you the plant is officially mature and ready for the 12/12 light cycle whenever you are.
Finally, just look at the plant’s size. A great rule of thumb is to flip to flower when your plant is about half of the final height you want it to be. Plants can easily double in size during the “flowering stretch” that happens in the first few weeks of 12/12 lighting. Timing the flip right ensures they don’t outgrow your tent.
Can I Switch a Plant from Flowering Back to Veg?
You can, but it’s a bit of a rescue mission, not a standard part of the playbook. This process is called re-vegging, and it’s extremely stressful for the plant.
To do it, you’d flip the lights from a 12/12 flowering cycle back to an 18/6 veg cycle. The plant will get seriously confused. You’ll see some pretty weird growth at first—think strange, single-bladed leaves and other mutations—before it eventually gets back to normal vegging. This whole process can take weeks, and the plant might not ever be as vigorous as it once was.
How Long Should the Vegetative Stage Last?
That’s the million-dollar question, and the truth is, there’s no single right answer. How long you let your plants veg comes down to your goals, your specific strain, and how much space you’re working with. If you’re growing photoperiod plants indoors, you’re the one in the driver’s seat.
Most indoor growers veg their plants for anywhere from 3 to 8 weeks. If you’re in a small tent or just want to get to harvest a bit faster, a shorter veg time of 3-4 weeks is a solid strategy.
On the other hand, if you’ve got room to spare and you’re aiming for a massive yield, letting your plant veg for 6-8 weeks gives it time to get big and strong. A bigger plant can support more branches and, ultimately, more bud sites. Strains matter here, too—a compact Indica might be ready to go sooner, while a lanky Sativa will appreciate the extra time to fill out its frame.


No Comments