

Effective Pest Control for Cannabis Plants a Grower’s Guide
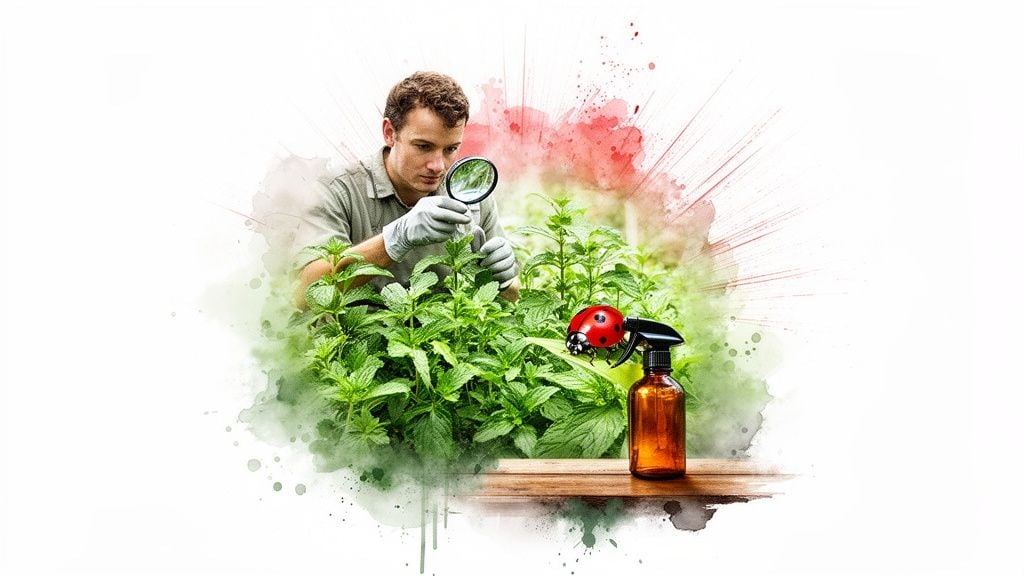
The best way to handle pests on your cannabis plants is to stop them before they even show up. It’s all about being proactive, not reactive. Your goal should be to build a strong, healthy garden where pests just can’t get a foothold. This entire strategy is called Integrated Pest Management (IPM), and it’s your absolute best line of defense.
Your First Line of Defense in Cannabis Pest Control
Finding bugs chewing on your cannabis can send you into a panic. The first instinct for many is to grab the most powerful pesticide on the shelf. But for a plant that’s going to be consumed, harsh chemicals are a non-starter, and this “spray and pray” approach often does more harm than good anyway.
This is where you need to flip the script. Forget about just reacting to problems. The best growers I know build a multi-layered defense system that prevents pests from ever becoming a real threat in the first place. That’s the heart of IPM—a smarter, safer way to protect your crop.
What is Integrated Pest Management?
Think of Integrated Pest Management less as a single action and more as a complete philosophy. It’s a comprehensive approach that uses a combination of tactics to keep pests in check, all while minimizing risks to you, your plants, and the environment.
For a cannabis grower, this boils down to a few core practices:
- Controlling Your Environment: You’ll learn to master your grow space’s temperature and humidity. The right conditions help your plants flourish while making life miserable for pests like spider mites.
- Preventing Entry: This is all about simple, smart habits. Always quarantine new plants before introducing them to your main garden and keep your grow area impeccably clean.
- Scouting and Identifying: You have to become a garden detective. Regularly inspect your plants for the earliest signs of trouble. Catching one or two pests is a minor annoyance; catching a full-blown infestation is a nightmare.
- Choosing Safe Solutions First: When you do need to intervene, IPM dictates that you start with the least toxic options. Think beneficial insects or organic insecticidal soaps, not synthetic chemical sprays.
The core idea of IPM is powerful: work with nature, not against it. When you create a balanced ecosystem in your grow room or garden, you make it incredibly difficult for any one pest to take over.
Why IPM is Essential for Cannabis
The proof is in the numbers. The global integrated pest management market was valued at $17.8 billion in 2021 and is projected to hit $34.0 billion by 2031. You can discover more insights about the IPM market on Allied Market Research. This isn’t just a trend; it’s a fundamental shift in how we approach agriculture.
This strategy is especially critical for cannabis. Unlike a rose bush, the final product is going to be inhaled or ingested, making any pesticide residue a major health hazard. A solid IPM plan doesn’t just protect your plants; it ensures a clean, safe product for whoever is using it.
This guide will walk you through building your own IPM plan from the ground up. If you need a refresher on the basics of cultivation, our complete growing guide for cannabis is a great place to start. Let’s get you set up to identify pests, build your defenses, and choose the right tools for the job.
Know Your Enemy: Identifying Common Cannabis Pests
If you want to beat pests, you first have to know who you’re up against. You can’t just grab any spray off the shelf and hope for the best; you need to identify your opponent to choose the right strategy. While dozens of critters can find their way into your garden, a handful of usual suspects cause most of the trouble.
Learning to spot these common invaders—what they look like, where they hang out, and the damage they leave behind—is the single most important skill you can develop as a grower. It’s what separates a calm, measured response from a full-blown panic.
The Art of Scouting Your Plants
Before we get into the “who’s who” of cannabis pests, let’s talk about how you find them in the first place. Pests are sneaky. They love to hide, so you have to get good at seeking them out. We call this “scouting,” and it needs to become a regular part of your garden routine.
Your best friend for this task is a jeweler’s loupe or a small digital microscope. A standard magnifying glass is okay, but a loupe with 30-60x magnification lets you see the tiny bugs and their even tinier eggs in crisp detail.
Here’s where to look during your daily patrol:
- Under the Leaves: This is ground zero. Most pests live and lay eggs on the undersides of leaves, especially in the denser, lower parts of the canopy where it’s more protected.
- New Growth: Tender new shoots are like a five-star meal for sap-sucking insects. Always give the tops of your plants a close look.
- The Soil Surface: Some pests, like fungus gnats, spend their larval stage in your growing medium. Keep an eye out for any little flies hovering around the base of the plant.
Pro Tip: A consistent scouting habit is non-negotiable. It only takes five minutes a day to check a few plants. Catching an infestation when it’s just a handful of bugs is a minor chore. Discovering it after it has exploded into a full-blown invasion is a catastrophe.
Meet the Top 5 Cannabis Pests
Let’s break down the most common bad guys you’ll likely face. Learning their calling cards makes identification quick and gets you on the path to treatment that much faster.
1. Spider Mites
These are probably the most hated pests in cannabis cultivation. Spider mites are tiny arachnids, not insects, and often just look like little moving specks to the naked eye.
- Key Sign: The dead giveaway is their fine, silky webbing, which they spin between leaves and around buds.
- Damage: They use piercing mouthparts to suck out plant juices, leaving behind a pattern of tiny white or yellow dots known as “stippling.”
2. Aphids
Aphids are small, pear-shaped bugs that can be green, black, yellow, or even pink. You’ll find them clustered together on stems and the undersides of leaves, especially on new growth.
- Key Sign: They breed fast and form dense colonies. They also secrete a sticky waste product called “honeydew,” which can lead to sooty mold or attract ants.
- Damage: Heavy feeding will cause leaves to yellow, curl up, and wilt.
3. Fungus Gnats
If you see little black flies that look like tiny mosquitoes buzzing around your pots, you’ve got fungus gnats. The adults are mostly just annoying, but their larvae living in the soil are the real problem.
- Key Sign: Seeing the adult gnats flying around is the most obvious sign, especially right after you water.
- Damage: The larvae munch on delicate root hairs, which stunts plant growth, causes leaves to yellow, and can open the door for root diseases.
4. Thrips
Thrips are incredibly small, slender insects that move quickly and are tough to spot without a loupe. They range in color from pale yellow to dark brown.
- Key Sign: Thrips leave behind a very distinct kind of damage: shiny, silvery, or almost metallic-looking patches on the leaves, often with tiny black specks of waste scattered around.
- Damage: They don’t just suck—they scrape the leaf surface to get at the contents, which messes with photosynthesis and can spread viruses.
5. Whiteflies
Just like the name says, these are small, white, moth-like insects. The easiest way to spot them is to gently shake an infected branch; if you have whiteflies, a little cloud of them will fly up before quickly settling back down.
- Key Sign: The “cloud effect” when a plant is disturbed is unmistakable.
- Damage: Like aphids, they suck sap, causing leaves to yellow and wilt. They also produce honeydew, which can lead to the same sticky, moldy mess.
Common Cannabis Pest Identification Chart
To make things even easier, here’s a quick-reference chart. Keep this handy to help you quickly diagnose any issues you spot during your daily scouting routine.
| Pest | Appearance | Common Location | Signs of Damage |
|---|---|---|---|
| Spider Mites | Tiny (speck-sized) red or black arachnids | Undersides of leaves, within webbing | Fine webbing, tiny white/yellow dots (stippling) on leaves |
| Aphids | Small, pear-shaped insects (green, black, etc.) | Dense clusters on stems & under leaves | Yellowing/curling leaves, sticky "honeydew," presence of ants |
| Fungus Gnats | Small, black flies resembling mosquitoes | Flying around soil and base of plant | Wilting, poor growth, yellowing leaves (from larval damage) |
| Thrips | Tiny, slender, fast-moving insects (yellow/brown) | On top of and underneath leaves | Irregular silvery/shiny patches on leaves, tiny black specks |
| Whiteflies | Small, white, moth-like insects | Undersides of leaves, fly up when disturbed | A cloud of flies when shaken, yellowing/wilting leaves, honeydew |
Remember, a fast and accurate ID is the first—and most important—step in taking back control of your garden. The sooner you know what you’re fighting, the easier the battle will be.
Building a Fortress with Proactive Prevention Strategies
Once you know what you’re up against, it’s time to build a defense so strong that pests never even get a foothold. The absolute best pest control is prevention. It’s a whole lot easier to keep pests out from the start than to wage war on them after they’ve turned your garden into their new home.
This all comes down to creating an environment where your plants flourish but pests can’t stand to be. Taking a proactive stance saves you a massive amount of stress, time, and potentially your entire crop. Think of your grow space as a fortress—every preventive action you take makes its walls that much stronger.
Start with Impeccable Cleanliness
A clean grow room is a truly hostile place for pests. Dust bunnies, dead leaves, and bits of spilled soil are all five-star hotels and breeding grounds for invaders. Keeping your space sterile isn’t just a suggestion; it’s a must.
Get into the habit of sweeping or vacuuming your grow area daily. Any plant debris, like fallen leaves or pruned stems, needs to be removed immediately and taken far away from your garden. Always sanitize your tools—pruners, trays, and pots—with isopropyl alcohol or a diluted bleach solution after each use to stop any potential cross-contamination in its tracks.
I can’t stress this enough: a clean start is everything. A messy grow room is basically a welcome mat for pests. Treat it like a cleanroom, not a garden shed, and you’ll head off countless problems before they ever have a chance to start.
Master Your Environment
Pests are creatures of habit. They thrive in very specific conditions, and you can turn that against them by taking firm control of your grow room’s climate. Spider mites, for instance, absolutely love hot, dry air with little to no movement.
By dialing in your temperature and humidity, you make your garden a much less inviting place. Air circulation is a massive part of this. Use oscillating fans to keep the air moving gently through the plant canopy, which breaks up those stagnant, humid pockets where pests love to set up shop. This simple step makes it incredibly difficult for them to settle in and multiply.
Here’s how to stack the deck in your favor:
- Intake Filters: Pop a simple filter over your ventilation intake vents. This acts as a physical screen, stopping airborne pests like thrips and fungus gnats from getting sucked into your pristine environment.
- Climate Control: Aim for temperature and humidity levels that are perfect for your plants but miserable for common pests. A stable environment also prevents plant stress, making them naturally more resistant to attack. Proper watering is also huge; you can learn more about how often to water weed plants in our guide to avoid problems like fungus gnats.
Quarantine All New Arrivals
One of the most common ways an infestation gets started is by unknowingly bringing in a contaminated plant. It doesn’t matter if it’s a clone from a trusted friend or a new strain you just bought—every new plant is a potential Trojan horse packed with pests.
Set up a strict quarantine zone. Any new plant has to be isolated in a separate room, far from your main garden, for at least two weeks. During that time, inspect it like a hawk every single day, looking for any sign of pests or their eggs. Only after it gets a clean bill of health can it join the rest of your crop.
Outdoor Defenses: Companion Planting
If you’re growing outdoors, nature provides its own set of bodyguards. Companion planting is the age-old practice of growing pest-repelling plants right alongside your cannabis. These allies can confuse or actively drive away pests with their strong, natural aromas.
Try planting these around your garden:
- Basil: A great choice for repelling aphids, thrips, and whiteflies.
- Lavender: Its powerful scent is known to deter moths and fleas.
- Rosemary: Effective against a whole host of bugs, including mites.
- Marigolds: A classic for a reason—they help repel nematodes in the soil.
This shift toward proactive management is happening everywhere. The global pest control market was valued at $20.1 billion in 2019 and is projected to skyrocket to $44.3 billion by 2034. You can explore more about these pest control market trends, which shows just how much the industry is moving toward smarter, preventive solutions. By adopting these strategies, you’re building that fortress, one stone at a time.
Using Natural Allies and Safe Solutions for Pest Treatment
Even with the best defenses, a few pests will inevitably sneak through. When that happens, you need to hit them with solutions that are tough on bugs but gentle on your plants and, most importantly, your final product. This is where your real allies come in: biological controls and low-toxicity treatments.
Ditching harsh chemical pesticides isn’t just a trend; for anyone growing clean, high-quality cannabis, it’s a must. The great news is nature has already built a pretty impressive arsenal for us. From beneficial insects that act like a tiny security force to plant-based sprays, you have plenty of ways to handle an outbreak without compromising your hard work.
Unleashing Beneficial Insects
One of my favorite and most effective IPM strategies is releasing “good bugs” to hunt down the “bad bugs.” It’s like building a living, self-sustaining defense force right in your garden. These predatory and parasitic insects are the natural enemies of common cannabis pests, and once established, they get to work 24/7.
Think of it as hiring a microscopic clean-up crew. Ladybugs are famous for chowing down on aphids, while predatory mites like Amblyseius swirskii are absolute beasts when it comes to thrips and spider mite eggs. Releasing them is easy, but getting them to stick around and do their job takes a little finesse.
To help your beneficials settle in:
- Time the Release: Always release them in the evening or when your grow lights are off. This encourages them to settle onto the plants instead of making a beeline for the brightest light source.
- Give Them a Snack: If pest numbers are low, you might need to provide an alternative food source, like banker plants or specialized pollen, to keep your army fed and on standby.
- Keep the Climate Right: Remember, these are living things. Make sure your temperature and humidity are within a range where they can thrive and reproduce.
The goal with biological controls isn’t to wipe out every single pest. It’s about creating a balanced ecosystem. A small, manageable pest population actually serves as a constant food source, keeping your beneficials on patrol and providing ongoing protection.
Applying Low-Toxicity Sprays Safely
Sometimes you need a more direct approach to knock down a sudden flare-up. That’s when organic and low-toxicity sprays become your best friend. They can be incredibly effective, but you have to use them correctly to avoid accidentally harming your plants.
Insecticidal soap is a great starting point. It works on contact, dissolving the outer shell of soft-bodied insects like aphids and spider mites, which causes them to dehydrate. Neem oil, which comes from the neem tree, is another classic. It messes with pests in multiple ways—acting as a repellent, an anti-feedant, and a growth disruptor.
The key with any spray is proper technique. Always mix it according to the label, and I can’t stress this enough: do a “patch test.” Just spray a single leaf and wait 24 hours to see if there’s any negative reaction before you spray the whole plant. For indoor grows, apply sprays right after the lights turn off; outdoors, wait until dusk. This simple step prevents the intense light from causing nasty leaf burn.
Flowering-Safe Pest Control
Everything changes once your plants start to flower. This is the most delicate stage, and a treatment that was perfectly safe a few weeks ago can now be a total disaster for your buds, wrecking their flavor, aroma, and even their safety.
Once you see those first pistils, you have to stop using any oil-based sprays, especially neem oil. That stuff will cling to the resinous trichomes, leaving a foul residue that’s impossible to wash off and will ruin your final product. Insecticidal soaps should also be avoided or used with extreme caution, as they can mute the terpenes and flavor profile.
During the flowering stage, these are your safest bets:
- Beneficial Insects: This is your #1 option. They do their work without ever touching or contaminating the buds.
- Physical Removal: On a smaller scale, you’d be surprised how effective it is to just wipe pests off the leaves with a damp cloth.
- Strategic Air and Water: A gentle mist of plain, pH-balanced water can dislodge spider mites. Cranking up the air circulation also makes the environment much less inviting for them.
The market is responding to the need for safer solutions. The global pest control products market, valued at $14.87 billion in 2024, is expected to hit $25.83 billion by 2033. This explosion shows just how much demand there is for effective and compliant options for specialty crops like cannabis. You can read the full research about pest control products to see the trends for yourself.
To make things easier, here’s a quick-reference table comparing some of the most reliable and safe treatment options.
Safe Pest Treatments for Cannabis
| Treatment | Target Pests | Application Stage | Key Considerations |
|---|---|---|---|
| Neem Oil | Spider mites, aphids, thrips, fungus gnats | Vegetative only | STOP use at the first sign of flowering. Can leave a residue that ruins flavor and aroma. |
| Insecticidal Soap | Aphids, spider mites, whiteflies | Vegetative; early flower (with caution) | Contact spray only; must directly hit pests. Can affect terpenes if used late in flower. |
| Beneficial Insects | Depends on species (e.g., ladybugs for aphids, predatory mites for thrips) | All stages | Best used preventatively. Ensure your grow environment can support them. Completely safe for flowers. |
| Bacillus thuringiensis (Bt) | Caterpillars, fungus gnat larvae | All stages | A naturally occurring bacterium that is highly specific to its target. Safe for plants, pets, and humans. |
| Spinosad | Thrips, caterpillars, spider mites | Vegetative; early flower (use cautiously) | A fermented soil bacteria product. Highly effective but check local regulations for use on cannabis. |
Choosing the right tool at the right time is what IPM is all about. By sticking to these flowering-safe strategies and understanding your options, you can protect your investment and ensure your harvest stays clean, potent, and enjoyable all the way to the finish line.
Bringing It All Together: Your IPM Action Plan
This is where the rubber meets the road. All the theory about identifying pests and picking the right treatments gets boiled down into a simple, repeatable routine. Let’s be clear: effective pest control isn’t about some grand, one-time fix. It’s all about consistency.
Turning your IPM strategy from a good idea into a daily and weekly habit is the final piece of the puzzle. An action plan removes the guesswork. You won’t forget to scout, and your preventive measures will happen on schedule. These small, consistent actions build a powerful defense that stops pest problems before they even start.
Your Daily and Weekly Battle Rhythm
Your IPM checklist has to work for you. It should be tailored to your specific setup, whether you’re working with a single tent in the basement or a whole backyard patch. The idea is to create a simple framework you can follow without having to reinvent the wheel every day.
Here’s a sample schedule I’ve seen work wonders. Tweak it to fit your life.
Daily Check-In (Just 5-10 Minutes)
- Quick Scan: Grab 3-5 plants at random and give the undersides of a few leaves a close look. A jeweler’s loupe is your best friend here—you’re looking for tiny mites, eggs, or any weird speckling.
- Sticky Trap Glance: A quick peek at your yellow sticky traps is an early warning system for flying pests like fungus gnats or thrips.
- Vibe Check the Room: Note your temperature and humidity. Are you in the sweet spot for your plants but making it miserable for pests?
Weekly Deep Dive (20-30 Minutes)
- Full-Scale Scouting: This is your detailed inspection. Get in there and look deep into the canopy, check different heights, and really see what’s going on.
- Clean Sweep: Tidy up the grow space. Sweep or vacuum the floor, wipe down surfaces, and get rid of any fallen leaves or plant debris. Don’t forget to sanitize your tools!
- Pot Rotation: Gently turn your pots for even light exposure. This is a great chance to inspect the base of the stems and the soil surface for any lurkers.
An IPM plan isn’t a “set it and forget it” document. It’s a living tool. The most successful growers I know are the ones who treat pest management as an ongoing process of observation, gentle correction, and continuous learning.
The Overlooked Superpower: Keeping Good Records
I can’t stress this enough: one of the most critical parts of any IPM program is keeping good records. It might feel like homework, but your garden log is the best teacher you’ll ever have. It transforms your experiences—both the wins and the losses—into priceless data that makes you a smarter, more efficient grower.
Your log doesn’t have to be fancy. A simple notebook or a basic spreadsheet is all you need. For every entry, just jot down a few key details.
What to Track in Your IPM Journal
- Date & Sighting: What did you find? Be specific. “Found 3 suspected spider mites on Plant #2, lower fan leaf.”
- Action Taken: What did you do about it? Log every treatment. “Spot-treated Plant #2 with insecticidal soap. Wiped affected leaf clean.”
- Environmental Data: Keep a running tally of your temperature and humidity. This helps you connect the dots, like noticing thrips appear after a heatwave.
- The Follow-Up: A few days later, check back in. “Checked Plant #2. No new signs of mites. Plant looks happy.” This feedback loop is pure gold; it’s how you learn what really works.
Over time, this log becomes your personal playbook for what beats pests in your specific environment. On top of that, remember that a well-fed plant is a strong plant. Ensuring your ladies get the right nutrients makes them far more resilient to attacks. You can learn more about the best nutrients for bigger buds in our comprehensive guide, which is a huge part of overall plant health.
Ultimately, this whole process puts you in the driver’s seat. By mixing diligent observation with a consistent routine and smart record-keeping, you shift from reacting to fires to preventing them entirely. That’s the mindset that leads to a healthy, pest-free harvest, time and time again.
At Liberty Seed Bank, we believe a healthy grow starts with strong, reliable genetics. Explore our premium selection of cannabis seeds and build the foundation for a pest-free garden today.
FAQs
I Have Spider Mites in Late Flower. What Can I Do?
Finding spider mites late in flower is every grower’s nightmare. At this critical stage, spraying oils or soaps is completely out of the question—it will contaminate your harvest. Your goal now is to manage the population and get your plants to the finish line.
It’s a race against the clock, but you’re not helpless.
Manual Removal: It’s tedious, but it works. Gently wipe the undersides of leaves with a soft, damp cloth. This physically removes mites, their webbing, and their eggs.
Environmental Control: Make life uncomfortable for them. Crank up the air circulation and, if you can, lower the room’s temperature. Spider mites thrive and reproduce like crazy in hot, stagnant air, so changing the environment can slow them down significantly.
Predatory Insects: This is your best and safest weapon in late flower. Release a batch of predatory mites like Phytoseiulus persimilis. They are natural-born spider mite hunters and will get to work immediately without leaving any residue or harming your flowers.
By combining these tactics, you can keep the spider mite damage to a minimum and still bring in a clean, well-deserved harvest.
How Do I Apply Neem Oil Without Harming My Plants?
Neem oil is a powerhouse in any grower’s toolkit, but you have to use it correctly or you can do more harm than good. The golden rule is to never apply it during the flowering stage. Its strong aroma and oily residue will absolutely ruin the taste and smell of your finished buds.
For safe use during the vegetative stage, mix 100% cold-pressed neem oil with warm water. You’ll need to add a few drops of a plant-safe soap to act as an emulsifier, otherwise the oil and water won’t mix.
Timing is everything. For indoor grows, apply it right when the lights go out. Outdoors, wait for the cool of the evening. Spraying neem oil under intense light is a surefire way to scorch your plant’s leaves.
Can I Use Household Soaps or Pesticides on My Cannabis Plants?
I get this question a lot, and the answer is a firm no. Please don’t use household soaps, detergents, or general-purpose garden sprays on your cannabis. These products just aren’t made for plants you’re going to consume.
They’re packed with chemicals that can easily burn your leaves, strip away the plant’s natural protective oils, and, worst of all, leave harmful residues on your buds.
Instead, always reach for products specifically made for horticultural use. A perfect example is insecticidal soap—it’s designed to be tough on soft-bodied pests but gentle on your plants. Sticking with organic and OMRI-listed products is always your safest bet for a clean, high-quality final product.



No Comments