

A Grower’s Guide to Setting Up a CO2 Grow Tent
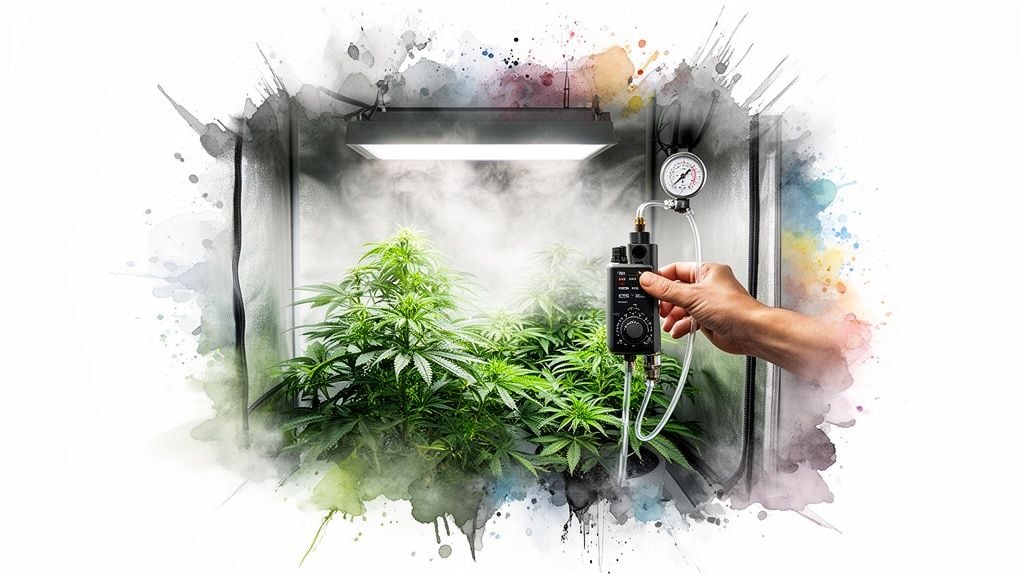
Ready to take your harvest to the next level? If you’re serious about getting the most out of your setup, adding a CO2 grow tent system is one of the single best moves you can make. It’s how you supercharge your plants and push them past their natural limits. By feeding them more CO2, you’re giving them the raw fuel for photosynthesis, and the results are undeniable: faster growth and seriously dense buds.
This isn’t some secret technique reserved for massive commercial grows anymore. It’s a proven strategy that any dedicated home grower can use to get truly professional results.
Why CO2 Is a Game Changer for Your Grow Tent
Think of it this way: CO2 is as essential to your plants as light and water. It’s a core building block for photosynthesis, the process they use to create energy and grow. The air we breathe has about 400 parts per million (ppm) of CO2, which is fine for normal, everyday plant growth.
But inside a high-intensity grow tent, “normal” isn’t what we’re aiming for. When you’ve invested in powerful lighting, your plants have the potential to work a lot harder, but they quickly run out of the naturally available CO2. Giving them high-powered lights without extra CO2 is like putting a race car engine in a go-kart and expecting it to win. Supplemental CO2 is the high-octane fuel that lets that engine really perform.
Supercharging Photosynthesis for Bigger Yields
Without enough CO2, all that expensive light from your LEDs or HPS lamps goes to waste. The plant simply hits a wall—it can’t photosynthesize any faster, no matter how much light you throw at it. This is exactly where CO2 enrichment steps in.
By bumping up the CO2 levels inside your sealed grow tent, you kick the plant’s metabolism into overdrive. The difference is something you can see.
- Faster Growth Cycles: Plants just move quicker through their stages. You can easily shave days, sometimes even a full week or more, off your total grow time.
- Increased Plant Mass: You’ll see it in the structure. Stems get thicker, fan leaves get bigger, and the whole plant becomes more robust and capable of holding up those heavy colas later on.
- Higher Yields: This is the big one. All that accelerated growth channels directly into bigger, denser, and heavier flowers. It’s a night-and-day difference at harvest.
- Greater Resilience: A happy side effect is that CO2-enriched plants can handle more stress. They can often tolerate slightly higher temperatures and more intense light, giving you a bit more wiggle room with your environment.
It all comes down to basic plant science. When you give your plants more of a key ingredient in a controlled environment, you unlock their true genetic potential. It’s that simple.
For a quick overview of what you can expect, here’s a handy table.
CO2 Enrichment At a Glance
This table breaks down the core benefits of adding supplemental CO2 to your grow tent. Think of it as a cheat sheet for the kind of improvements you’re aiming for.
| Benefit | Typical Improvement | Optimal CO2 Level (ppm) | Best For |
|---|---|---|---|
| Increased Yield | 20-30% or more | 1,200 – 1,500 | Growers with high-intensity lighting (LEDs, HPS) |
| Faster Growth | Up to 30% shorter cycle | 1,200 – 1,500 | Anyone looking to reduce time from seed to harvest |
| Temperature Tolerance | Can thrive up to 85-95°F | 1,200 – 1,500 | Hot climates or setups prone to heat buildup |
| Light Saturation | Maximizes powerful lights | 1,200 – 1,500 | Growers who have already maxed out their light intensity |
As you can see, the goal is to create a high-performance environment where all components work together.
The Numbers Behind the Growth
This isn’t just grower’s-luck; the results are measurable. In a dialed-in grow tent, bumping CO2 from the ambient 400 ppm to an optimal range of 1,200-1,500 ppm can ramp up photosynthesis by a staggering 30-50%.
That translates directly to 20-30% faster growth and yield increases of 25% or more, assuming your lighting and nutrient game is on point.
Of course, CO2 doesn’t work in a bubble. To get these kinds of results, you need to make sure your plants have the light and food to keep up. If you’re looking to dial in your feeding program for huge flowers, our guide on the best nutrients for bigger buds is a great place to start. When you get the balance right between light, nutrients, and CO2, you create the perfect conditions for a truly massive harvest.
Choosing the Right CO2 System for Your Grow Tent
Alright, let’s talk about picking the right CO2 setup. This is a big decision, and what works for a commercial grower is overkill for a hobbyist. Your choice really boils down to your budget, the size of your tent, and just how much control you want over your environment.
We’re going to break down the four main ways to get CO2 into your tent: compressed tanks, generators, those simple hanging bags, and even some DIY yeast methods. Think of it like choosing a tool for a job. You wouldn’t use a sledgehammer to hang a picture frame, right? Same idea here—let’s find the right fit for your specific grow.
Comparing CO2 Methods for Your Grow Tent
Use this side-by-side comparison to find the CO2 system that best fits your budget, tent size, and experience level.
| Method | Best For | Initial Cost | Ongoing Cost | Pros | Cons |
|---|---|---|---|---|---|
| CO2 Tank & Regulator | Serious growers needing precise control in tents 4'x4' and larger. | High | Moderate (tank refills) | Unmatched precision and control; most effective for maximizing yield. | High upfront cost; requires careful setup and monitoring. |
| Propane/Gas Generator | Commercial-scale operations or multiple large tents. | High | Low (fuel) | Very high CO2 output; cost-effective for huge spaces. | Produces significant heat and moisture; fire risk; not for small tents. |
| CO2 Bag | Beginners, small tents (under 3'x3'), or those experimenting with CO2. | Low | Low (replace bag) | Extremely simple and safe; no electricity needed; "set it and forget it." | No control over output; provides only a modest PPM boost. |
| DIY Fermentation | Hobbyists on a tight budget or those who enjoy DIY projects. | Very Low | Very Low (sugar/yeast) | Costs almost nothing to start; a fun science experiment. | Inconsistent and weak output; requires frequent maintenance (remixing). |
Each of these systems has its place. Your goal is to match the tool to the task—and your wallet—to get the best possible results from your garden.
CO2 Tanks and Regulators: The Professional Standard
When you get serious about maximizing your yields, nothing beats a compressed CO2 tank with a quality regulator. This is the setup the pros use, and for good reason. It gives you surgical precision, letting you dial in the exact PPM levels you want.
With a good controller, you can time the CO2 release to sync perfectly with your lights-on cycle, ensuring your plants get that boost exactly when they can use it. This is how you consistently hit that sweet spot of 1,200-1,500 ppm for truly explosive growth. The initial investment is a bit steep—you’ll need the tank, regulator, solenoid, and controller—but the ongoing cost is just for tank refills. It’s the go-to for any tent 4’x4′ or larger where performance is the top priority.
Propane and Natural Gas Generators: For Large Spaces
CO2 generators are absolute workhorses. They burn propane or natural gas to create a steady stream of carbon dioxide, and they can easily supply massive grow rooms. For most home growers, though, these are total overkill for a single co2 grow tent.
They come with some serious baggage. First, they kick out a ton of heat and moisture, which means you’ll need to beef up your ventilation and probably your air conditioning. Second, you’re dealing with an open flame, which brings an obvious fire risk. For these reasons, generators are almost exclusively found in large commercial setups, not home grows.
CO2 Bags: The Set-It-and-Forget-It Option
If you’re just dipping your toes into CO2 enrichment or working with a small 2’x2′ or 3’x3′ tent, a CO2 bag is a fantastic starting point. Inside is a living mycelium culture that breathes out CO2 slowly and steadily for months. You just hang it up and walk away. No wires, no setup, no fuss.
The trade-off is that you have zero control. You can’t turn it off or adjust the output. It won’t get your tent to the optimal 1,500 ppm, but it will reliably raise levels above ambient air, giving your plants a noticeable leg up. It’s a cheap and easy way to see what CO2 can do for you before you invest in more expensive gear.
Key Takeaway: Your choice of CO2 system directly impacts your ability to control the environment. For maximum yield potential, precise control is essential, making tank-and-regulator systems the superior choice for serious growers.
DIY Fermentation: The Budget-Friendly Experiment
Want to try CO2 for pocket change? Grab a jug, some sugar, water, and yeast. This classic fermentation method creates a natural bubbling process that releases CO2. It’s a fun little science project and costs practically nothing to get started.
Just like with the bags, you get what you pay for. The CO2 output is pretty inconsistent and dies down as the yeast runs out of sugar, meaning you’ll have to mix up a new batch every week or so. It’s a decent option for a tiny tent if you’re on a shoestring budget and just want to see a small bump in growth.
Making the Right Financial Call
Ultimately, your decision comes down to what you’re trying to achieve. For serious U.S. breeders working with top-shelf genetics, a precise CO2 system is a no-brainer investment. A dialed-in 10’x10′ tent can pull 10-15 pounds a cycle, which can easily translate to over $20,000 at wholesale prices. This kind of high-efficiency growing is becoming more common, with urban farming adoption growing by 15% annually worldwide since 2020. You can check out more market trends and find additional grow tent industry statistics to see the bigger picture.
For the hobbyist, however, a simple CO2 bag might be all you need to get a more satisfying harvest without breaking the bank.
What You’ll Need for a Sealed CO2 Grow Tent
Getting CO2 enrichment right is less about the gas itself and more about building a fortress for your plants—a perfectly sealed and controlled environment. Just pumping CO2 into a leaky tent is like trying to fill a bucket with a hole in it. It’s a total waste of time and money.
Let’s walk through the gear you absolutely need to get this done properly. Think of this as your core toolkit. Cutting corners on any of these pieces will just lead to frustration and lackluster results.
The Brains of the Operation: A CO2 Controller
First up, and this is non-negotiable, you need a CO2 controller. This little box is the command center for your entire system. It constantly measures the parts per million (ppm) of CO2 in your tent’s air, so you’re not just flying blind.
Your controller plugs directly into your CO2 source, like the solenoid on a tank regulator. It automatically turns the gas on and off to keep you dialed in at your target ppm. This is what prevents wild swings in CO2 levels and, more importantly, stops the gas from climbing to dangerous highs that can hurt your plants or even you. It’s the single most important piece of gear for both safety and effectiveness.
Sealing Your Grow Tent for Success
The golden rule of CO2 is simple: your tent has to be a sealed environment. This means turning off your intake and exhaust fans whenever you’re adding CO2. If your ventilation is running, you’re just sending all that expensive gas straight outside before your plants get a chance to breathe it in.
You’ll need to get your systems working together. A basic timer can cycle your exhaust fan on and off, but a more advanced environmental controller is a game-changer, managing your lights, fans, and CO2 all in one place. The goal is to let the exhaust fan kick on every so often to pull out heat and humidity, but only after the CO2 has been shut off for a bit.
Pro Tip: Before you start adding any equipment, grab a roll of duct tape and sit inside your zipped-up tent with the lights off. Seal every pinhole of light you see, especially around zippers and cord ports. An airtight tent is an efficient tent.
Regulators and Tubing: The Delivery System
If you’re going the compressed tank route, a quality regulator with a solenoid valve is a must-have. The regulator screws onto the tank and brings the immense pressure inside down to a safe, slow flow. The solenoid is the electronic gatekeeper that opens and closes to release the gas—this is the part your controller actually talks to.
From the regulator, you’ll run some flexible tubing into your tent. Where you put the end of this tube actually matters quite a bit for getting even distribution.
Don’t Forget Air Circulation
Here’s a fact a lot of beginners miss: CO2 is heavier than air. If you just let it trickle into the tent, it will sink and form a useless puddle on the floor, leaving the canopy starved for gas. The fix is cheap and simple: an oscillating fan.
Good circulation is key to making your investment count.
- An Oscillating Fan: You need at least one small fan inside the tent to keep the air gently moving at all times. This constant motion mixes the heavier CO2 into the ambient air, making sure every leaf gets access.
- Tubing Placement: A good trick is to run your CO2 tube so it releases the gas right in front of the fan’s path. Or, you can hang the tube from the ceiling, pointed down toward the fan.
Without that fan, you’ll end up with CO2 “dead zones” and “hot spots,” completely defeating the purpose of the whole setup. This one simple fan is often the difference between a successful co2 grow tent and a failed experiment.
A Stage-By-Stage Guide to Using CO2 Safely

When it comes to CO2, timing is everything. Just pumping gas into your tent 24/7 isn’t just a waste of money—it’s totally ineffective. The whole point is to feed your plants when they’re actually “eating.”
Plants only use CO2 during photosynthesis, which means the lights have to be on. Adding it when they’re sleeping in the dark does absolutely nothing but drain your tank. To get that explosive growth you’re after, you need a smart, stage-by-stage strategy that keeps your plants happy and, more importantly, keeps you safe.
Seedling and Early Vegetative Stage
Let’s start with the easiest phase: seedlings and fresh clones don’t need any extra CO2. Period. Their little root systems and leaves are still getting established, so they simply can’t process the extra gas. Their growth is limited by their size, not by a lack of CO2.
Trying to force high levels of CO2 on them now is like trying to make a baby eat a steak. Just stick with the normal ambient air, which is around 400 ppm. Focus on nailing your humidity and providing gentle light. You can start thinking about CO2 once your plants have a few sets of true leaves and a solid root ball.
Mid-to-Late Vegetative Stage
Alright, once your plants are established and growing like weeds, it’s go-time. This is when you can start adding CO2 to really push vegetative growth, building a strong, bushy frame that will support massive flowers later on. But don’t just crank it to the max right away.
I always start by setting my controller to a modest 800-1,000 ppm. This gives the plants time to adjust and ramp up their metabolism without getting stressed. Think of it as training your plants to become high-performance engines. You should see a noticeable jump in their growth rate within a week or so.
Safety First: CO2 is an asphyxiant in high concentrations. Never, ever walk into your grow tent right after the CO2 has been on. Always shut the gas off and run your exhaust fan for a good 10-15 minutes to clear the air before you go in to work.
Flowering Stage: The Main Event
The flowering stage is where CO2 enrichment really proves its worth. As your plants switch from making leaves to making buds, their metabolic rate goes through the roof. Now’s the time to give them all the fuel they can possibly handle.
During the first few weeks of flower, you can slowly bump up the CO2 levels into that sweet spot of 1,200-1,500 ppm. This is where the magic happens for photosynthesis, packing on serious weight and density. Your plants will be working overtime, turning all that light, water, and food into huge, frosty flowers. If you want to get a better handle on what your plants are doing, you can learn more about the cannabis flowering stage in our detailed guide.
Just keep these key points in mind for flowering:
- Peak Levels: Only keep the PPM between 1,200-1,500 when your lights are on.
- The Final Weeks: Cut the CO2 supply completely about two weeks before you plan to harvest. At this point, the plant is focused on ripening, not building new mass. I’ve found that continuing CO2 can sometimes mess with the final taste and smell.
- Keep Everything in Sync: Higher CO2 levels demand more light and warmer temps (usually 80-90°F) to work properly. Make sure your whole environment is balanced.
Crucial Safety Protocols for Your Grow Room
Using CO2 is perfectly safe, as long as you treat it with respect. A simple mistake can be dangerous, so making safety checks a non-negotiable part of your routine is mandatory.
A high-quality CO2 monitor with an audible alarm is the single most important piece of safety gear you can buy. Set it to go off if levels creep past 2,000-2,500 ppm. This will be your early warning system for a regulator failure or a bad leak.
Here are my non-negotiable rules for a safe co2 grow tent:
- Always Vent Before Entering: This is the golden rule. Turn off the CO2 and run your exhaust fan for several minutes before you even think about opening the tent.
- Mount Tanks Securely: A compressed gas tank can turn into a literal missile if it falls and the valve snaps off. Use a chain or a heavy-duty strap to secure your tank upright to a wall stud or another solid object.
- Check for Leaks: Every time you swap a tank, mix up some soapy water and spray it on all the connections. If you see bubbles, you’ve got a leak that needs tightening. This saves gas and prevents a dangerous, slow buildup.
- Know the Signs: Symptoms of CO2 overexposure include dizziness, headaches, feeling short of breath, and confusion. If you ever start to feel off while working in your grow area, get out into fresh air immediately.
Follow this playbook and make safety your top priority, and you’ll be able to use CO2 to pull down harvests that you previously only dreamed about.
Balancing Your Environment for CO2 Success
Adding CO2 to your grow tent is like dropping a turbocharger into your plant’s engine. All of a sudden, they have the potential for explosive growth. But just like a high-performance car, you can’t just hit the gas and expect it to work—it needs better fuel, stronger tires, and a fine-tuned system to handle that extra power.
You have to rebalance the entire growing environment to match this new potential. That means taking a hard look at everything from your lights to your feeding schedule. When you get these key factors synced up, you unlock the massive yields a co2 grow tent can produce. Honestly, this is the single biggest reason I see growers fail to get a good return on their CO2 investment—they skip this crucial step.
The Critical Link Between CO2 and Light Intensity
Think of CO2 and light as the two main ingredients for photosynthesis. If you crank one up, you absolutely have to increase the other to keep things balanced. Pumping a tent full of CO2 while running weak, underpowered lights is just throwing money away. The plants simply can’t use the extra gas.
On the flip side, blasting powerful LED or HPS lights in a room with normal ambient CO2 (around 400 ppm) creates a bottleneck. Your plants hit their processing limit pretty fast, and all that extra light just turns into wasted energy and excess heat. With supplemental CO2, your plants can handle—and will actually demand—a lot more intense light to fuel their supercharged metabolism.
Adjusting Temperature for Peak Performance
Most growers are taught to keep their tents in that sweet spot of 70-85°F. When you add CO2 to the mix, though, the rules change. The plant’s stomata, which are the tiny pores on its leaves that breathe in CO2, don’t have to open as wide to get what they need. As a side effect, the plant conserves more water, making it surprisingly resilient to higher temperatures.
This is a game-changer. You can let your tent run warmer, often in the 85-90°F range, without stressing out your plants. In fact, they love it. That higher temperature actually speeds up their metabolic rate, helping them take full advantage of the extra light and CO2 you’re giving them.
Think of it as a three-part harmony. CO2, light, and temperature all have to rise together. If you push one without the others, you’ll throw the whole system out of whack and kill your results.
Increasing Nutrients for Hungry Plants
A plant running on high CO2 and intense light is like an Olympic athlete in training—it develops a massive appetite. Your old feeding schedule just won’t cut it anymore. Your plants are building tissue at a blistering pace and will suck the medium dry of nutrients if you’re not careful.
You have to get good at spotting the early signs of hunger.
- Watch the leaves: The first hint of yellowing, especially on the lower leaves, is often a red flag for a nitrogen deficiency as the plant pulls mobile nutrients up to new growth.
- Check your runoff: If the PPM of your runoff is consistently way lower than what you’re putting in, your plants are screaming that they’re hungry.
- Feed more or feed stronger: You’ll almost certainly need to either increase the concentration of your nutrient solution or just feed them more often to keep up. Don’t be afraid to experiment and see how they respond.
With more nutrients in the mix, water chemistry becomes even more critical. If you see your pH start to drift, for instance, you’ll want to know how to raise pH in water properly to make sure those extra nutrients are actually available to the plant.
Staying ahead of their needs is everything. If you wait until you see major deficiencies, you’ve already lost precious growth. A successful co2 grow tent is managed by a grower who can anticipate what the plant needs next and provide the fuel for it to perform at its absolute best.
Ready to unlock the full genetic potential of your plants? At Liberty Seed Bank, we provide the premium seeds you need to make every harvest a success. Explore our curated collections of feminized and autoflower strains to find the perfect match for your high-performance grow tent. Start shopping now at https://libertyseedbank.com.
FAQs
Do Autoflowers Even Benefit From Extra CO2?
They sure can, but you have to approach it a bit differently. An autoflower is on a non-stop race to the finish line from the moment it sprouts. You can’t extend its veg time. So, anything you can do to boost its growth during that short window directly translates into a bigger plant with more bud sites.
For autos, a more moderate boost to around 800-1,000 ppm during their most explosive growth phase works wonders. You’re maximizing their potential within the limited time they have. Just remember to cut off the CO2 for the last two weeks as they ripen, the same as you would for any photoperiod strain.
Can You Overdo It With CO2?
Yes, absolutely. And it’s not just a waste—it’s bad for your plants and potentially dangerous for you.
Plants love CO2, but only up to a point. Once you push past 2,000 ppm, it starts to become toxic for them. Their stomata can slam shut, which basically suffocates them and shuts down photosynthesis entirely. You’ll see the damage as yellowing leaves, stunted growth, or what looks like nutrient burn.
More importantly, CO2 levels creeping above 4,000-5,000 ppm are a health hazard for people. This isn’t something to guess at. A reliable CO2 controller with a built-in monitor and safety features isn’t just a good idea; it’s a non-negotiable piece of equipment for any serious CO2 setup.
Why Do I Have to Turn My Exhaust Fan Off?
Think of it this way: running your exhaust fan while pumping in CO2 is like trying to fill a bucket with a hole in the bottom. You’re just wasting money. The whole point is to seal the tent and let the CO2 concentration climb to that sweet spot of 1,200-1,500 ppm.
Your exhaust fan’s job is to pull out stale air and bring in fresh air. If it’s on, it’s just going to suck all that precious CO2 right out of the tent before your plants can even breathe it in. The right way to do it is to shut down the ventilation, dose the tent with CO2, let the plants absorb it, and then kick the fans back on later to handle heat and humidity.




No Comments