

Your Guide to the Best Grow Lights for Indoor Cannabis
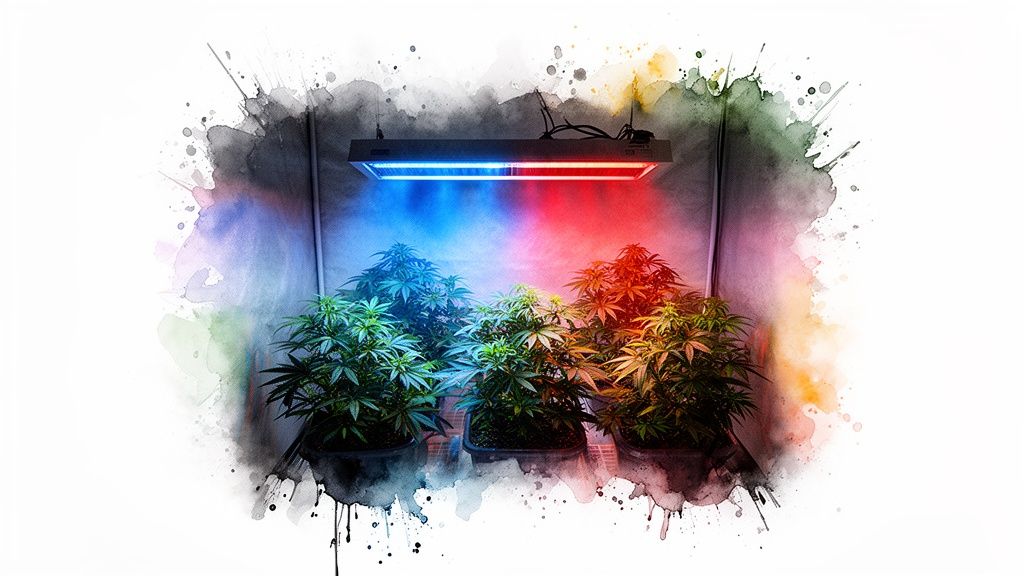
If you’re growing cannabis indoors, your best bet is almost always a full-spectrum LED grow light. They hit the sweet spot of energy efficiency, low heat, and long life, which is why they’re the top pick for everyone from first-timers to seasoned pros.
Finding the Right Light for Your Indoor Grow
Picking a grow light is easily the most important decision you’ll make for your garden. Think of it as the engine that drives photosynthesis. The right light directly impacts how fast your plants grow, how dense your buds get, and how heavy your final harvest will be. Even with the best genetics in the world, a weak light will always lead to a disappointing outcome.
By the way, if you’re just getting started, you might find our guide on the germination time for cannabis seeds helpful for kicking things off on the right foot.
This choice is a bigger deal than ever. The North American market for cannabis grow lights was worth a whopping USD 1.65 billion in 2023 and is on track to nearly double to about USD 3.53 billion by 2033. For us home growers, that explosive growth is great news—it means more competition, better technology, and more options than ever before. You can read more about the trends in the grow light market if you’re curious.
Key Factors in Your Decision
Before you get lost in the tech specs, start by asking yourself three simple questions. Your answers will immediately narrow the field and point you toward the right light for your setup.
- How big is your grow space? A light built for a tiny 2’x2′ closet will be completely useless in a 5’x5′ room. Matching the light’s coverage area, or “footprint,” to your tent is the only way to get even, healthy growth.
- What’s your budget? The initial price tag can vary wildly, but don’t forget about the long-term running costs. A cheap light today might end up costing you a lot more on your electricity bill down the road.
- What are your goals? Are you just looking for a small personal stash, or are you trying to squeeze every last gram of high-potency bud out of your plants? Your ambitions dictate the power and features you’ll need.
Your grow light is more than just a bulb; it’s the sun for your indoor garden. Investing in a quality light is an investment in the quality and size of your final harvest.
To make things a bit simpler, let’s start with a quick overview of the most common light technologies you’ll find today. Each has its pros and cons, but you’ll see why one stands out for most home growers.
Quick Comparison of Popular Grow Light Types
This table breaks down the main players at a glance, focusing on what matters most when you’re setting up your own grow.
| Light Type | Best For | Efficiency | Upfront Cost | Heat Output |
|---|---|---|---|---|
| LED | Most growers seeking quality and control. | High | Medium-High | Low-Medium |
| HPS | Growers prioritizing flowering power on a budget. | Low | Low | Very High |
| CMH | Growers wanting a balanced, sun-like spectrum. | Medium | Medium | High |
As you can see, while older technologies like HPS and CMH still have their uses, LEDs generally offer the best all-around package for the modern indoor grower.
A Grower’s Guide to Lighting Technologies
Before you can pick the right grow light, you need to know what you’re choosing from. Each technology out there has its own unique blend of power, efficiency, cost, and quirks. Getting a handle on these differences is the first real step to matching a light to your grow room and your goals.
Let’s walk through the four main players you’ll encounter: LED, High-Pressure Sodium (HPS), Ceramic Metal Halide (CMH), and good old Fluorescent lights.
LED Grow Lights: The New Gold Standard
There’s a reason Light Emitting Diodes (LEDs) have taken over the indoor growing world. They are, hands down, the most efficient lights you can buy, turning more of your electricity into light your plants can actually use and wasting far less as heat. This is a game-changer.
Think of an LED panel as a smart system. It’s made up of dozens or hundreds of tiny diodes, each tuned to a specific color. This lets manufacturers create a tailored “full-spectrum” that hits all the right notes for photosynthesis, from vegetative growth to heavy flowering.
Here’s why so many growers have made the switch:
- Top-Tier Efficiency: A good LED fixture delivers an efficacy of 2.5 µmol/J or even higher. That means it pumps out over 50% more growth-power per watt than an old-school HPS bulb.
- They Run Cool: LEDs generate way less heat, which simplifies your life immensely. You can get them closer to your plants without scorching them, and you won’t have to fight a constant temperature battle in your tent.
- Built to Last: A quality LED light can run for 50,000 hours or more. That’s easily five times the lifespan of an HPS bulb, meaning you won’t be buying replacements for a very, very long time.
Yes, the initial price tag can be a bit higher. But when you factor in the energy savings and the fact that you won’t be replacing bulbs, LEDs often end up being the smartest financial choice in the long run.
High-Pressure Sodium (HPS): The Old-School Flowering Beast
For decades, if you wanted big, dense buds, you ran an HPS light. These things are absolute powerhouses, famous for their intense, orange-red glow that drives cannabis plants into a flowering frenzy.
An HPS light is like a raw, untamed floodlight. It blasts your canopy with an incredible amount of light, punching deep into the lower branches. But that brute force comes with a price—HPS bulbs are terribly inefficient. They get incredibly hot and guzzle electricity.
HPS lights have a long and proven history of producing massive yields. Just be prepared to deal with the heat. A proper setup requires serious ventilation and cooling, which adds cost and complexity.
They still have a place, especially for growers on a tighter initial budget who have the space and equipment to manage the extreme heat.
Ceramic Metal Halide (CMH): The Spectrum Specialist
Ceramic Metal Halide (CMH) lights, sometimes sold as Light Emitting Ceramics (LEC), are a smarter, more refined version of the even older Metal Halide (MH) tech. Their biggest selling point is their light quality, which is a much more balanced, full-spectrum output that looks a lot closer to natural sunlight.
This fantastic spectrum makes CMH a great “all-in-one” light that can take a plant from seedling all the way through harvest. They run more efficiently and last longer than HPS, but they’re still no match for modern LEDs and produce a fair bit of heat themselves. CMH lights fill a great middle ground for growers who want that sun-like intensity without shelling out for a top-of-the-line LED.
Fluorescent Lights: The Perfect Start
Fluorescent lights, whether they’re T5 tube fixtures or simple Compact Fluorescents (CFLs), are the low-and-slow option. Their light is soft and they run very cool to the touch, which makes them absolutely perfect for the most delicate stages of growth.
They are the go-to choice for starting seeds, rooting clones, and nurturing young vegetative plants. But that gentle nature is also their biggest weakness. Fluorescent light just doesn’t have the muscle to penetrate a thick canopy, leaving lower branches in the dark. For that reason, they are completely inadequate for the flowering stage when your plants need all the intensity they can get. Think of them as a nursery light, not a finishing light.
How to Read a Grow Light Spec Sheet
Shopping for a grow light can feel like trying to decipher a foreign language. The product pages are a soup of acronyms and technical specs that can make your head spin. But here’s the secret: once you know what a few key terms mean, you can cut through the marketing fluff and see exactly what a light is capable of.
Getting a handle on these numbers is the difference between buying a high-performance light and an overpriced paperweight. Let’s break down the most important metrics so you can compare lights with confidence and know your money is going toward a bigger, better harvest.
Decoding Light Intensity and Quantity
First things first, we need to talk about how much light a fixture actually produces and, more importantly, how much of that light reaches your plants. These numbers tell you everything about a light’s raw power and coverage area.
Think of PPF (Photosynthetic Photon Flux) as the total amount of usable light (PAR) the fixture pumps out every second. It’s like the total volume of water gushing from a firehose. A bigger PPF number means the light is producing more “food” for your plants overall.
But PPFD (Photosynthetic Photon Flux Density) is where the rubber meets the road. It measures how many of those light photons are actually landing on a specific spot on your plant canopy. Sticking with our hose analogy, this is like measuring how much water is hitting a single leaf. For a grower, this is the most practical number because it shows the real-world intensity your plants will experience.
A classic rookie mistake is buying a light with a huge PPF but terrible distribution. You end up with a laser-like “hot spot” directly under the light that fries your plants, while the corners of your tent are left in the dark. Always, always look for a manufacturer’s PPFD map.
A good PPFD map will show you the light intensity measured across a grid (like a 4’x4′ area) at a certain hanging height. This simple chart is the best tool you have for judging a light’s true, even coverage.
Understanding Light Spectrum: The Plant Recipe
It’s not just about how much light you have, but what kind of light. The quality, or color, of the light is just as important as the quantity. A good “full-spectrum” light is designed to mimic the sun, giving your plants the right colors for every stage of their life.
- Blue Light (400-500 nm): This is the magic ingredient for the vegetative stage. Blue light promotes strong, stocky growth with thick leaves and robust root systems. It keeps your plants from getting weak and “stretchy.”
- Red Light (600-700 nm): When it’s time to flower, plants get hungry for red light. This part of the spectrum is the primary driver for budding, flower development, and terpene production. A heavy dose of red light is what gets you those dense, frosty buds.
The best lights deliver a balanced diet of both, often with more blue for vegging and a big spike in red for flowering. Some of the newer lights even let you tune the spectrum yourself, giving you total control over how your plant grows.
Efficacy: The Miles Per Gallon of Your Light
Last but not least, let’s talk about efficiency. Photosynthetic Photon Efficacy (PPE) is basically the “miles per gallon” rating for your grow light. It’s measured in micromoles per joule (μmol/J) and tells you how good the light is at converting electricity (watts) into usable plant light (PPF).
A higher μmol/J number means more light for your buck, plain and simple.
For instance, a modern LED with a 2.7 μmol/J efficacy rating produces a whopping 50% more usable light per watt than an old-school HPS bulb running at 1.8 μmol/J. That difference adds up quickly in lower electricity bills and less heat to deal with in your grow space.
So, when you’re comparing lights, don’t get fixated on the wattage. A super-efficient 400-watt light can easily run circles around a poorly made 600-watt light, all while saving you a nice chunk of change every month.
Matching Your Grow Light to Your Space
Alright, this is where theory meets reality. We’ve talked about the specs, but now it’s time to apply that knowledge to your actual grow tent. The goal is simple: give your plants the power they need to thrive without overdoing it and cooking them or wasting electricity.
You’re trying to bathe your entire plant canopy in a consistent, even blanket of light (PPFD). Let’s walk through the most common setups, from a tiny closet grow to a full-on grow room, and nail down the right light for each.
Lighting a Small 2×2 Grow Tent
A 2’x2′ tent is a classic starting point for a reason. It’s perfect for one or two smaller plants and fits just about anywhere. The main challenge here is getting even light coverage in such a tight space and avoiding hot spots that can scorch your leaves.
- Vegetative Stage: You’ll want a gentle but steady PPFD around 300-400 μmol/m²/s. This gives young plants the energy to grow strong and bushy without being overwhelmed.
- Flowering Stage: Time to crank it up. Aim for 500-750 μmol/m²/s to really drive bud production and density.
- Recommended Wattage: A modern, high-efficiency LED that pulls 100-200 watts from the wall is the sweet spot.
In this size, a simple panel-style LED can get the job done on a budget. But if you can swing it, a smaller bar-style light will give you far better coverage from corner to corner, ensuring those lower bud sites don’t get left in the dark.
Powering the Standard 4×4 Grow Tent
The 4’x4′ tent is the workhorse of the home growing community. It gives you enough room for four good-sized plants and can produce some serious harvests. This is also where the difference between a cheap light and a quality fixture becomes crystal clear.
- Vegetative Stage: Look for a solid 400-600 μmol/m²/s across the whole canopy. This builds a robust structure that can support heavy flowers later on.
- Flowering Stage: To get the kind of yield you’re dreaming of, you need an average PPFD of 700-1,000 μmol/m²/s. This is the prime range for massive flower production without getting into CO2 supplementation.
- Recommended Wattage: A top-tier LED pulling 450-650 actual watts is what you need to properly power this space.
A cheap light in a 4’x4′ tent will give you a blazing hot spot in the middle and weak, shadowy corners. The result? A few nice top colas and a lot of fluffy, underdeveloped buds. This is where investing in a quality bar-style light pays for itself in the first harvest.
Illuminating a Larger 5×5 Grow Room
When you step up to a 5’x5′ space, you’re getting into serious production territory. This setup has the potential for huge yields, but only if you bring enough power to the party. Under-lighting a 5’x5′ is one of the most common and disappointing mistakes a grower can make.
- Vegetative Stage: You’ll need a consistent 400-600 μmol/m²/s to make sure every plant in that large space is getting what it needs.
- Flowering Stage: Push the intensity to 800-1,000+ μmol/m²/s for truly impressive results. Advanced growers might even push this higher, but that usually requires adding supplemental CO2 to the room.
- Recommended Wattage: Don’t mess around here. You need a powerful fixture that draws 650-800 actual watts.
For a big footprint like this, you absolutely need a light designed for it, typically one with six or eight light bars. This design is the only way to guarantee that plants on the edges are getting just as much love as the ones in the center.
Recommended Light Specs for Common Grow Tents
Feeling a bit overwhelmed? Don’t be. This simple chart cuts through the noise and gives you clear targets to aim for. Just find your tent size and you’ll know exactly what kind of power you need for each stage of growth.
| Grow Space Size | Vegetative Stage (Avg. PPFD) | Flowering Stage (Avg. PPFD) | Recommended LED Wattage (Actual) |
|---|---|---|---|
| 2' x 2' | 300-400 μmol/m²/s | 500-750 μmol/m²/s | 100W – 200W |
| 4' x 4' | 400-600 μmol/m²/s | 700-1,000 μmol/m²/s | 450W – 650W |
| 5' x 5' | 400-600 μmol/m²/s | 800-1,000+ μmol/m²/s | 650W – 800W |
Use these numbers as your guide when shopping, and you’ll be well on your way to choosing a light that sets you up for a successful harvest.
Managing Heat and Electricity in Your Grow Room
A powerful grow light is only half the battle. If you can’t handle what it puts out—namely, heat and a higher electricity bill—you’re setting yourself up for trouble. This is a lesson many growers learn the hard way.
These two factors can absolutely make or break your grow. Too much heat stresses your plants, practically rolling out the welcome mat for pests and mold. And if you don’t budget for the power draw, you might get a nasty surprise when the bill comes, turning a fun hobby into a financial headache.
Let’s walk through how to get a handle on both.
Taming the Temperature
Every single watt your light pulls from the wall eventually becomes heat. The real difference between light types is how they manage that heat.
Old-school High-Pressure Sodium (HPS) lights are legendary for running hot. Think of an HPS bulb as a small space heater hanging over your plants. It’s not uncommon for them to spike the temperature in a grow tent by 15-20°F, which means you absolutely need a powerful ventilation system just to keep things from cooking. That’s an added cost, extra noise, and more complexity.
This is where modern LEDs really shine. A quality LED light is built with heat management in mind, often using big, passive aluminum heat sinks to spread the warmth out silently and effectively. They run dramatically cooler, which makes controlling your environment a whole lot easier, especially in a small tent.
Here’s a pro tip: Managing heat isn’t just about keeping your plants comfortable. A cooler light can be positioned closer to the canopy, blasting your plants with more intense, usable energy without the risk of scorching the leaves.
Calculating Your Monthly Energy Costs
Nobody likes surprises on their utility bill. Thankfully, figuring out what your light will cost to run is pretty simple math. You just need three pieces of info: your light’s actual wattage, how many hours a day it’ll be on, and what you pay for electricity.
Here’s the quick and dirty formula:
- Figure out your daily Kilowatt-hours (kWh): (Your Light’s Wattage ÷ 1000) x Hours On Per Day
- Find the daily cost: Daily kWh x Your Rate (the $/kWh on your bill)
- Get the monthly estimate: Daily Cost x 30
Let’s run a real-world example:
Imagine you’re running a 450-watt LED for the 18-hour veg cycle, and your power company charges $0.17 per kWh.
- (450W ÷ 1000) x 18 hours = 8.1 kWh per day
- 8.1 kWh x $0.17 = $1.38 per day
- $1.38 x 30 days = $41.40 per month
Doing this little bit of math upfront is huge. It lets you see the true long-term cost of a light and clearly shows how a more efficient model can save you a chunk of change every single month.
Don’t Skimp on Electrical Safety
When you’re excited to get a grow started, it’s easy to overlook safety. Don’t. You’re mixing high-powered electronics with water and humidity—that’s a combination that demands respect.
To keep your home and your hobby safe, only buy lights that have been tested and certified by a proper safety agency. You’re looking for one of these marks on the light, the driver, or the box:
- UL (Underwriter Laboratories): The gold standard for safety certification worldwide.
- ETL (Intertek): A widely respected lab that tests to the exact same safety standards as UL.
This is non-negotiable. Seeing a UL or ETL stamp means the light has been put through its paces to make sure it won’t be an electrical or fire hazard. It’s the single best thing you can look for to get some peace of mind.
The Future of Smart and Automated Grow Lights

The world of indoor growing is moving way past simple on/off timers. We’re stepping into an era of truly intelligent lighting systems that remove the guesswork, making it easier than ever for home growers to get professional-level results.
Imagine a grow light that essentially acts as a personal botanist for your plants. These “smart” fixtures can automatically adjust their own intensity and spectrum based on what your plants need at that exact moment. This isn’t just about convenience; it’s about precision.
Automated Light Recipes for Peak Performance
Think of a standard grow light as a speaker that plays the same song on a loop. A smart light is more like a live DJ, changing the music to match the mood of the room.
It can automatically deliver a blue-heavy spectrum during veg to encourage short, bushy growth, then smoothly shift to a deep-red spectrum to trigger explosive flowering.
This level of control opens up some amazing possibilities:
- Custom “Recipes”: You can program specific light cycles designed to enhance certain traits, like boosting terpene production for richer aromas and flavors.
- Sunrise/Sunset Simulation: Many smart lights can mimic the sun’s natural daily cycle, gently waking plants up and easing them into darkness to reduce stress.
- Remote Control: With Wi-Fi and app integration, you can check on and adjust your lights from anywhere. It’s total peace of mind in your pocket.
These automated systems are all about giving your plants exactly what they need, precisely when they need it. The result is less manual work for you and a healthier, more productive garden.
The Rise of AI and IoT in Growing
This leap forward is happening thanks to huge progress in connected technology. In fact, smart lighting powered by the Internet of Things (IoT) and artificial intelligence is now the fastest-growing part of the entire LED grow light market.
These systems adapt light intensity, duration, and spectrum automatically in response to your plant’s growth stage and environment. The benefits are massive—they can seriously improve your yields and plant health while also cutting down on energy costs. You can dive deeper into these innovations in the U.S. LED market.
What was once only found in high-tech commercial operations is quickly becoming accessible and affordable for the dedicated home grower. As this technology keeps evolving, the best grow lights won’t just be powerful—they’ll be intelligent, helping you get incredible results with more ease and precision than ever before.
How Many Watts Do I Really Need Per Square Foot?
The old rules of thumb from the HPS days are officially outdated. With today’s high-efficiency LEDs, a much better target is 30 to 50 actual watts per square foot.
- For a 2’x2′ tent (4 sq ft): You’ll want a light in the 120W to 200W range.
- For a 4’x4′ tent (16 sq ft): Look for something between 480W and 800W.
Remember, PPFD is the metric that truly matters, but using wattage is a fantastic shortcut to narrow down your options to lights that are properly sized for your space. Getting your indoor garden started can be surprisingly straightforward, especially if you pick from the easiest strains to grow indoors.
At Liberty Seed Bank, we believe a successful harvest starts with great genetics. Find the perfect seeds for your brand-new lighting setup by exploring our premium collection. Visit us today at https://libertyseedbank.com.
FAQs
Will a Super Bright Grow Light Bother My Neighbors?
Not if you have a decent grow tent. A quality tent is designed to be a self-contained environment. The thick, light-proof fabric, overlapping zipper covers, and well-designed vent ports will trap virtually all the light inside.
This keeps your grow completely private and prevents any “light pollution” from escaping. Plus, modern LEDs run much cooler and quieter than the humming ballasts of old HID systems, making your whole setup far more discreet.
How Many Watts Do I Really Need Per Square Foot?
The old rules of thumb from the HPS days are officially outdated. With today’s high-efficiency LEDs, a much better target is 30 to 50 actual watts per square foot.
How Much Is This Going to Cost Me on My Electric Bill?
The running cost comes down to two simple things: your light’s power draw (wattage) and what you pay for electricity.
To give you a real-world example, a modern, efficient 450-watt LED running for a 12-hour flowering cycle will typically add $25 to $35 to your monthly bill. An old-school HPS light putting out similar power? That could easily run you $45 to $60 for the same period. It pays to do the math before you buy.
Can I Just Use a Regular LED Bulb from the Hardware Store?
In short, no. While it might seem like a clever hack, a standard household LED bulb is designed for human eyes, not for plant photosynthesis. It’s like trying to feed a gourmet meal to a plant that only eats sunlight.
These bulbs just don’t have the right light recipe—the specific spectrum and high intensity (PPFD)—that cannabis needs to grow strong and produce dense flowers. Using one will only get you a sad, stretchy plant and a harvest that’s not worth the effort.


No Comments